Sunday, December 25, 2011

Update on Projects

In between a Victorian Christmas dinner and burning my hand pretty badly, I managed to get some work in on my to do list of projects.  Most of my every day sewing takes place at my dinning room table.  Due to the large Christmas dinner, I had to clean off the table.  This actually allowed me to sort out and prioritize things a bit!

The Month Two Project from Scrap Tamers

Yes, technically month two got done before month one.  Month one is just waiting on hand stitching the binding and it is actually over halfway done. 

The month two project is based on two different nine-patch blocks that are then alternated to create other patterns.  The project can be done in just about any size.

Block one is a fairly simple nine-patch using squares and half square triangles


Block two is more complicated.


I had a piece of bright orange fabric in my stash.  I picked it up at a Mill end and had no idea what do to with it.  It’s metallic – almost – and has a bit of a coating.  I figured that it wouldn’t make a good bed quilt fabric, but a table topper would work.  Since I was already going overboard with bright orange, I matched it with several other bright fabrics and came up with this.


As you can see, Bronx approves.


Mariner’s Compass blocks

I’m moving forward, just showing some pictures.  These were taken quickly, late at night.  The colors are NOT correct.  The blocks are purples and greens, not pinks and brown/tans.

Should be a purple - lavender background.

Grey green background....

Saturday, December 24, 2011

Purses, Hardware and My To-Do List

Bear with me… I have some things to discuss, and this is going to be a bit of a long, disjointed blog ramble.

Subject 1 – Purse Hardware


I went to see my son last weekend.  He lives in North Carolina, in the country, and is very much a “redneck”.  He calls himself that, so I can!  He hunts, fishes, works as a welder and drives a beat up pickup truck which is also used to haul home deer and other game.  His house is 1 ½ hour drive from the “big” city that has an airport with FOUR gates.  When he lived at home, he was also the child who showed the second most interest in my sewing/crafting hobbies.  However, his interest was to make useful things rather than decorative.

Anyway, he picked me up in said beat up pickup truck he told me that since he’d driven to town, he’d had to stop at the local Joann’s.  He showed me his purchase and complained about the price.  He is making duck call lanyards. 


I find that to be immensely creative.  Apparently he’s sold quite a few of them and has orders for more.  His initial materials stash was partially gifted to him and partially re-used items.  The cording is from a large spool (hundreds, if not thousands of yards) of Army green cord that is something like parachute cord – it was left over Army supply.  Each lanyard has 3 or 5 loops on it in which you can secure a duck call with a cord lock.  The cord locks he was using were cut from discarded Army clothing.  However, he’d run out and stopped at the Joann’s to buy some.  They were $2.50 for two and he was upset.

I felt his pain.  When I made the professional tote bags, I too had to buy cord locks.  I waited until the last moment to get them and didn’t have much choice.  I bought the same 2 for 2.50 at Joann (black) and spent a similar amount for two white ones at a quilt shop.  I plan on making more bags – both the professional tote and other pieces – that use cord locks.  Since he needed some – and needed them cheaper than $6.75 in materials per lanyard – and since I wanted a stash, I figured that I could find some site on the internet where I could either get them in bulk or use my whole sale tax ID number.

My son is making these lanyards to get a little spending money.  I’m not the type of parent who hands over cash/pays bills for their children.  I really, really like that he’s trying to earn a little extra – especially since he’s encroaching upon my territory and involving thread craft and accessories that I would buy.  I really believe in a hand up, not a hand out.  This was perfect!  I could gift my son with something for Christmas, something that he would use, from a shop that I would also buy something!!  Every artistic mother’s dream fulfilled – crafting/creating alongside one’s child!!!

I found a wonderful site!  Strapworks.com. I spent $50 with shipping and bought hundreds! They have many different colors and many shapes.

The larger barrel cord locks are what he needed.  They are also the kind I used on my two professional totes.  The cost per unit was $0.25 and $0.35 depending upon exact size and shape.  I only have the $0.35 pictured here; the $0.25 ones are more cylindrical versus the bowling pin shape.  The smaller circle ones are only $0.05 apiece but are definitely far lesser quality.  I will be using those for light weight projects where the cord lock does not get much use.  They would be really good on American girl doll clothes and small accessories.  The pretty colored ones pictured here are for me – his are black, Army green (hunting green) and grey.  I got orange, lilac, lavender, fuchsia and mint green!

Another thing that I purchase for purses are D-rings and snap hooks.  The craft stores have many choices – silver and gold.  Quilt shops and other online stores have a few more – brass, old fashioned brass, polished and dull silver.  Yes, I’m being sarcastic.  Strapworks has MANY colors – anodized onto the metal.  I was unsure of sizing; the craft stores and quilt shops basically carry one, maybe two sizes.  Since I wanted to make a quick order to get my son a bunch of what he needed first, I just picked out a couple of the metal accessories in different sizes and colors.  I plan on making another bulk purchase in the next month or so.  Before doing so, I’m going to take their catalogue and my samples to my quilt groups and see if anyone else wants anything.  

Subject 2 – Lollipop Bag


I took another class at Bear Patch.  I can’t remember the teacher’s name.  This bag is a Terry Atkinson pattern.  I’m really beginning to love her patterns.  They are well done, directions are good, and she’s from here!

I was traveling so much, and not home during Nov/Dec, that I FORGOT about the class.  Mid day through work, I noticed it on my calendar!!!  Good thing that I synch my work and personal calendars!  (Side note:  I use Google calendar so that my hubby can view from anywhere as well and I “invite” my work email address to classes and things.  That puts the event on my work calendar as well, and synchs any updates I make).  So, instead of planning out what the purse was going to be, etc., etc., I ran home and grabbed up a bunch of larger left over pieces from recent projects.  I made one complete purse at the class and cut out several others.

That action turned out very well.  First, it helped me keep with my determination to “buy little – use stash”.  Second, I used fabrics the coordinated very well with the flowers that I made on vacation (see this post).  The pattern has a flower included in it, but it didn’t impress me.  I really like the look that my pin back orchids have on the purse.

I was not, however, happy with the pattern dictated purse hardware.  I thought that the D ring and snap hook were just too heavy and bulky for a small bag like this.  I made subsequent purses with the D ring only.  However, now that I have discovered strapworks and their many sizes of D rings and snap hooks – I think that I will make more with the small size. 

I made four of the batik purses.  The one with the rounder flowed and the full hardware is the first one made and will be for me.  One with an orchid was given to my daughter in law when I was down seeing my son.  When I was making the three subsequent batik ones, I was at a sewing day at a quilt shop and discovered that I did not have an appropriate topstitching thread for the little triangles on the front.  I could have bought thread there, but I have so much at home.  Instead, I decided to use those decorative stitches – of which I have MANY and I hardly use – to create a unique look on each purse.  

The two brighter ones are made with leftovers from one of my professional totes.  You will notice that I did NOT do the triangles on them.  I felt that the fabric was too busy for something like that.  I also don’t think that flowers are appropriate on them.  When I have a little time this weekend, I’m going to dig through my button boxes.  A few years back, I bought a ton of big, bright buttons from a children’s clothing designer that was going out of business.  I seem to recall that I have some 2 inch or so green and pink buttons in odd shapes.

Subject 2 – I Am Behind on All Projects!!


If I post my to do list here in this blog – I will feel more obligated to catch up!  Right?

From Thanksgiving until now, most quilting has been put aside.  I spent the end of November on vacation, and my December days have been split between work and traveling around the country to see my children.  I’ve only had two non-work days at home since November 20 and my projects have been the item that suffered.  One of those two days was spent at Glad Creations making the purses listed above and getting about halfway caught up on my Twin Cities Quilting block of the month.

It’s now Christmas, and I have a four day weekend this week, a four day weekend next week, and NO PLANS to travel or do anything else.  January will see me taking another one week vacation that involves a plane trip.  However, this time will not be the quilting wasteland that other plane trips have involved.  I don’t take many projects with on vacation because checking bags costs and my carryon just doesn’t have the space.

I gave in.  I got the Delta perks American Express card.  I can check a bag for free and so can my hubby.  We travel light generally, so the extra space can go to some projects.  I won’t be taking a sewing machine, but I will be taking all the cutting, trimming, binding, etc., that I want to catch up on.

So, below is the list.  I WILL get this done by end of January.  Note that I do NOT list laying out, pinning, quilting or binding for most of the pieces.  Due smaller rooms and no carpeting in my house, I save my laying out for quilt retreats.   

Mariner’s Compass quilt

·         Design layout
·         Print all blocks
·         Cut out/prep all pieces for blocks
·         Assemble blocks
·         Cut sashing pieces
·         Assemble quilt

Here’s a rendering of the design for the Mariner’s compass quilt.  If you remember from this post, I will be making different sized blocks.  The squares are the different blocks and the odd sized pieces will be sashing/filler fabric that coordinates. 

Curved Piece quilt

·         Finish cutting blocks
·         Assemble blocks
·         Layout quilt/arrange blocks

Block of the Month – TCQ

·         Frame 8 inch blocks
·         Make current blocks
·         Determine layout
·         Decide on other blocks to complete layout
·         Make additional blocks (I have PLENTY of fabric for that!!)
·         Assemble quilt

Scrap Tamers

If you recall, besides being a mystery for the year, Scrap Tamers is also a Marti Mitchell club and hands out a pattern each month.  I am doing a piece from those patterns each month, and can ONLY use existing, on hand fabrics, thread, backing, batting, etc.  These are small pieces, so I have to quilt and bind too.
·         Month 1 – Bali Runner (can’t remember rest of name)
o   Finish binding
·         Month 1 clue
·         Month 2 – (can’t remember name at all)
o   Finish binding
·         Month 2 clue
·         Month 3 – Seven sisters baby quilt
o   Determine layout
o   Cut out any additional blocks needed (most are already cut)
o   Assemble blocks
o   Assemble quilt
·         Month 3 clue
·         Month four – just got, haven’t looked at
o   Determine project
o   Cut out blocks
o   Assemble blocks
o   Assemble quilt
·         Month 4 clue

Block of the Month – Fat Quarter Quilt shop, paper piecing

Due to the absolute incompetence of this shop and this program (see this post), I have determined that I will not be completing this block of the month program.  I bought the book, paid for the program, completed block one and paid for the kit for block two.  I really like the book – that’s the one saving grace.  However, the blocks and fabrics don’t thrill me.  I think I’ll cut up the fabric from block kit two for my rolls of 1 ½ - 4 inch fabrics (used in scrap quilts) and frame up block one to make a small table topper.  It can go to a church auction or something.

Contest entry

See here for the “test” quilt I made for the contest.  The contest is a challenge; I can use black, white, black and white and a green fabric.
·         Determine color scheme
·         Organize fabrics
·         Cut fabrics
·         Piece blocks
·         Assemble blocks

Friday, November 25, 2011

Fabric Flowers

Being out of town, and away from my sewing machine doesn’t mean that I’m away from creativity and fabric!

Every year for Thanksgiving, I go to Daytona Beach for a week.  I fly down – with hubby, sometimes with kids, and this year with friends – and have a solid week of not being home, not having my stash and not having several sewing machines.  It’s my time every year to go low tech with my fabric art work. 

There’s an added challenge to this endevour - I travel light.  I don’t check bags and that means two things:  I don’t have a lot of space and I can’t bring large, sharp objects.  This means my projects have to be small – both in starting materials and in finished product – and have to use items that I can take onto the plane.  I don’t bring much of the projects with me.  I rely upon local shops.  I also take books along on my vacation and when I finish one, I drop it in the library at our resort.  This means that my projects get the space taken up by one to three books.

Two years ago, I brought along one of my jewelry plieers (small, short nose) and stopped at a bead shop.  I made several nice necklaces that I still wear to this day.  Last year, I decided to knit Christmas stockings for my daughter and her significant other.  I bought yarn, needles and a $2 scissor at a local craft store.  I figured that the needles could come back on the plane (they did), but was unsure about the scissors.  That why I bought cheap and I left it in the room when we left.

The stockings that I made were nothing spectacular.  I could have made much better with fabric, the sewing machine and the embroidery machine.  However, that was not my goal.  The goal was to create something out of love for my daughter; something made over time, with my own hands, and demonstrative of my love and care for her.

This Year:

A few days before I left, I went to one of my block of the month groups.  This particular group is a good one and shows new products and patterns for the quilt shop.  That sort of show and tell is a good move for the shop and it worked on me.  One of their new things was patterns for large fabric flowers.  I bought one – an orchid – and decided to make a bunch of them on the trip.  I figured that they will be very nice decorating tote bags and purses, in addition to being very nice gifts on their own. 

The pattern pieces are circles of fabric.  I cut out enough for 18 flowers before leaving home and packaged them up.  I also packed thread, needles, a small scissors (ginghers stork) and pins.  The resort we stay in is a fully equipped condo.  I always have an iron and an ironing board – two tools that I also needed for making the flowers. 

I needed a couple other things, but didn’t have them on hand.  Our first day in town included a visit to the craft section of a local walmart.  I bought a mini glue gun, glue sticks, a sheet of felt, beads and stuffing.  Ok, I did have beads at home but I forgot those and the stuffing.  Stuffing was a bit of a quandary in the store.  The smallest choice in the craft section was a bag of fiber fill the size of a small pillow.  I only needed tiny bits of it for the center of the flowers and certainly didn’t want to bring back that large bag.  After a little thought, I went to the Health and Beauty section and bought a small package of cotton balls.

So, here’s the end product!

How many I’ve completed so far:
Front view of one of the flowers:

Back view of another.  The pin back is another little touch – this will make them good as small gifts for people as brooches.


Sunday, November 20, 2011

Mariner's Compass

I don't feel much like writing tonight, so I'm going to fill in with pictures.....

A couple of weeks ago, I took a class at Bear Patch Quilting on the Mariner’s Compass pattern.  I promised pictures and updates – so here goes.

Following my promise to myself to start using more stash, I bought nothing for the class; only grabbed some complimentary fabrics that I already had.  Since the class, I decided to make a full sized quilt using Mariner’s Compass blocks, but not to make the blocks the same – not even the same size.

The class taught me some tips and tricks for this semi-complicated style of blocks.  Then, I have a Carol Doak collection of Mariner’s Compass blocks in a program on my computer.  It allows me to print any of them in any size I want.  I’ve designed a quilt with 26 Mariner’s compass blocks.  The range in diameter from 4 inches (the finished circle part) to 20 inches.  The original block made in class was 12 inches – finished to and 18 inch square with the border around the circle.

Here are the pictures of my progress so far:

The original block from class:


Some more blocks that will finish to 18 inches square like the original:  


With few exceptions, the blocks will have appliquéd center circles like the original.  I have not yet gotten those centers done.  That’s a project to do someday while watching a movie.

A very large block – this will finish to 28 inches square.  It will be the largest block.  I’m not putting it in the center of the however;  there will be no symmetry to the quilt.


Here are some of the smallest blocks that will be in the quilt.  These will be squared to 8 inches.


Saturday, November 19, 2011

Coupons, Quilting, Photography and Geeks


Intro

The post today is going to be a convoluted story of different hobbies, different types of people and how they all get connected.  It’s a great study in how the most diverse types of people can actually meet somewhere in the middle.

First of all, there are many types of quilters in this world.  I got into quilting because of two traits of mine.  The first is that I am a creative person.  I consider myself an artist – even though I cannot draw in the traditional sense.  I need paper (or a computer program) that gives me a grid and allows me to draw geometric things.  That’s actually the second trait – my love of things geometric.

My second trait – the geometrical side of my personality – stems from my very rational mind.  Yes, it really sounds like trait one and trait two are polar opposites.  Artistic flow tends to be chaotic and Logical flow… well…isn’t…

I love Art.  Of all forms.  I cannot say, however, if I love Art more than I love technology.  Give me some bits and bytes and I’m in heaven.  I can work all day long in front of a computer and then come home and surf for hours.  While I still read many books, I read on line, connect with friends, plan things, you name it. 

I connect with people who are also “geeks”.  While I cannot develop (program), I understand those who do.  I speak in databases and processing speeds.  In fact, although several of my best friends are also artists in the traditional sense (Cathy, Brandie:  I’m speaking to you), the majority of the people I connect best with work in IT fields.  With few exceptions, IT industry people are not considered to be art aficionados or those who appreciate traditionally non technological fields such as quilting.

Geek Aspect/Hobby – Photography

Photography is another medium (not primary and not minor, but medium) hobby of mine.  This is where the geek takes a bit of a lead.  In 1995, when digital cameras first hit the mainstream market at an affordable price, I bought one.  I had always been interested in photography, but there was too much uncertainty when taking pictures (will they turn out?  Did I do that right?) and not much instantaneous gratification, so I had not invested much time and effort.  The digital camera changed that; I could see right away if the picture was good, and I could take many more without having to change or develop film.  I could also crop and manipulate the photos.

I always stored my pictures on my home computer (with multiple backup copies) but I also printed them into albums.  A few years ago, I purchased space on an online storage (Photobucket.com) site that allowed me to do greater sharing and use of my photos.  In true geek style, I paid for the better site that allowed for more pictures, larger files, and more tools for online albums, etc.  In fact, one of my daughters went through the site and create a calendar for me with family pictures.  It was the best Christmas present.

I’ve taken many pictures of my quilts and I use them to illustrate this blog, for displaying in trade offers (I trade for other products; I don’t sell them), entries to contests, etc.  Quilts are hard to display well for pictures, so I use a lot of cropping and filtering tools.  This is where a digital camera comes in very handy!

It also seems like many other geeks – developers, Systems analysts, DBAs – that I know also have an interest in digital photography. 

Frugal Aspect/Hobby – couponing

When I was a young and very poor, I got into extreme couponing.  I don’t have the time for that now; somewhere along the line, my hourly wage went up enough that clipping, collecting and exchanging hundreds of coupons each week no longer passed the CBA (cost benefit analysis).  However, I’m still very conscious of the price of items, annoyed with inflation, and appreciate a good deal when I find it.  I discovered the new trend of Groupon, Living Social, Crowd Cut and other sites that present a hot deal/deals each day.

One of these deals that I bought was for Vistaprint.  As previously mentioned, one of my favorite presents ever was a photo calendar.  My youngest daughter put it together with pictures from my online storage site.  I decided to do the same this year (including making another for myself!).  The coupon from Vistaprint covered several calendars, but left me with about $4-5 dollars.  It wasn’t enough for another calendar, but it was enough for a small spiral bound photo book with a dozen-twenty photos.

Hmmm…

Quilt pictures?

Sure….. that works

I looked through my online photos, selected around a dozen that were fairly decent pictures and threw together a little book. 

Social Aspect/Hobby - Friday Night Dinners

Today the calendars and the book came in the mail, and tonight we had dinner with our friends.  This is a regular Friday night occurrence.  It’s a casual get together and it’s a rotating group of 3-20 and today was an unusual group.  It was hubby and I, a single friend and two other couples.  Another friend of ours came, and brought SEVEN other people with him.  I’d met two-three of them at another large dinner, but the rest were newcomers to my world. This friend is a DBA (Data Base Administrator) and most of his group (if not all) were IT crowd people.  On my “side” were a quilting friend, a college friend who is a talented seamstress, craftsman of different sorts and a novice (soon to be expert) quilter who works in IT, and the rest – while not quilt people in their own rights – hang around with those of us who are. 

The Quilt Photo Book

I showed the book to my two quilter friends and they admired the quilts.  We talked a little about them.  The next to look at the book were the others from my group.  They looked at them for more the pictures; not being quilters they were less understanding of the quilt techniques.

Now here’s where it gets pretty cool.

One of the guys who I hadn’t met before was into photography.  He’s an IT person.  I whipped out my book and showed him the photos.  I believe that his concentration – at least at first – was on the technique on the photos and he started giving me tips (very appreciated) on how I could edit the photos to enhance the unique lighting problems with that type of photo/subject matter.

Then we got started on how I design the quilts – my use of graph paper, a techie program called Visio (a flowchart/design type of program versus actual quilt programs) and bits and pieces far more related to computers than old fashioned quilting.  The conversation went on for quite a while, with several people commenting and asking questions about the pictures, the quilts and the techniques.

I’m used to a lot of non quilters giving looks of contempt about and not understanding the degree of skill needed for quilting.  There are many people who regard quilting as “cheesy” and/or “homemade” and that quilters are little old ladies who make simple “blankets”.  Tonight, I didn’t get that attitude at all; no, what I got was admiration and interest for the digital photography, the use of the photo book, the techniques for my quilting and the actual quilts themselves.

Conclusion

It was really an interesting discussion and an interesting evening.

Notes:

·         I used Vistaprint for this particular book
·         I use Photobucket for my photos;  you can browse my site from here
·         I printed out calendars and this photo book in the 4 x 6 size


Friday, November 11, 2011

A Tale of Three Quilt Shops

(And of three classes)

I’m going to start with the disappointing experience first, but the other two are not in any sort of judgmental order.

Fat Quarter Quilting in Coon Rapids

While visiting Fat Quarter for the first time during the Harvest Sampler Quilt Shop Hop, I signed up for a paper piecing block of the month and two Friday evenings of open sewing.  I really enjoy blocks of the month programs and although I can sew at home on Friday evenings, I’m trying to make new friends and be more social.

The block of the month program had already started (just one month), but since I really like paper piecing, I thought I’d sign up and learn some new tricks.  The other BOMs that I am doing are all very social and new shop items – fabrics, books, tools – are always demoed.  I expected the same of this one.

The first sewing Friday evening was one week after the Shop Hop.  I went to work with my sewing machine and projects tucked into my trunk, left early and headed to the shop.  I am a contractor and working an overtime job, so leaving work early means giving up billable hours.  This was hobby, and socialization, so giving up pay didn’t matter as much.

I walked into the shop and it was empty except for the person working….. hmmm….

“I’m here for the sewing evening”

She got a look of panic on her face and started apologizing.  She grabbed a discount card and punched it all out while telling me that they’d cancelled it but had forgotten to call me.

Disappointing, but these things happen, right?

Three weeks later, just this past Monday, was the second meeting of the BOM.  I went in with my block done, and once again the store was a dead zone.  I was only about five minutes early.  I asked about the BOM and was directed to the back room where one woman – the instructor – was already there.  Two more people arrived shortly after. 

The instructor was new; she’d just taken over for someone else.  She had not done the blocks – either Month One, or the Month Two being introduced.  She had, however, done block three… ??  But she didn’t show it.  She and the shop steward conferred, dug out the box for the BOM and even had to make up another packet for me. 

Hello???  There were THREE people there and you didn’t have enough pre-made packets?

There was then awkward conversation for about 15 minutes, and then the class was over.  It lasted that long because I asked a few questions and tried to draw it out longer…. To no avail.  There were no demos, no show and tell, no hints, nothing.

I left thinking I would go back the next month, but not again if it was just as bad.

I may, however, rethink that after Chapter Three in this saga.

Tonight was the next Friday sewing night that I’d signed up for.  Fool me once, shame on you; fool me twice, shame on me…. To avoid that, I looked at the website – Yup, still on the calendar.  I packed up my car last night, and once again planned to leave work early.

Hmmm, what if?  So, I called the store.  Remember, the event is STILL on their online calendar.

Nope, she had no idea what I was talking about.  Apparently, there’s some bus tour tomorrow and the Friday event was once again cancelled….

I’m signed up for it….

No one called me….

AAARRRGHH…. That is no way to run a business. 

Bear Patch Quilt Shop in White Bear

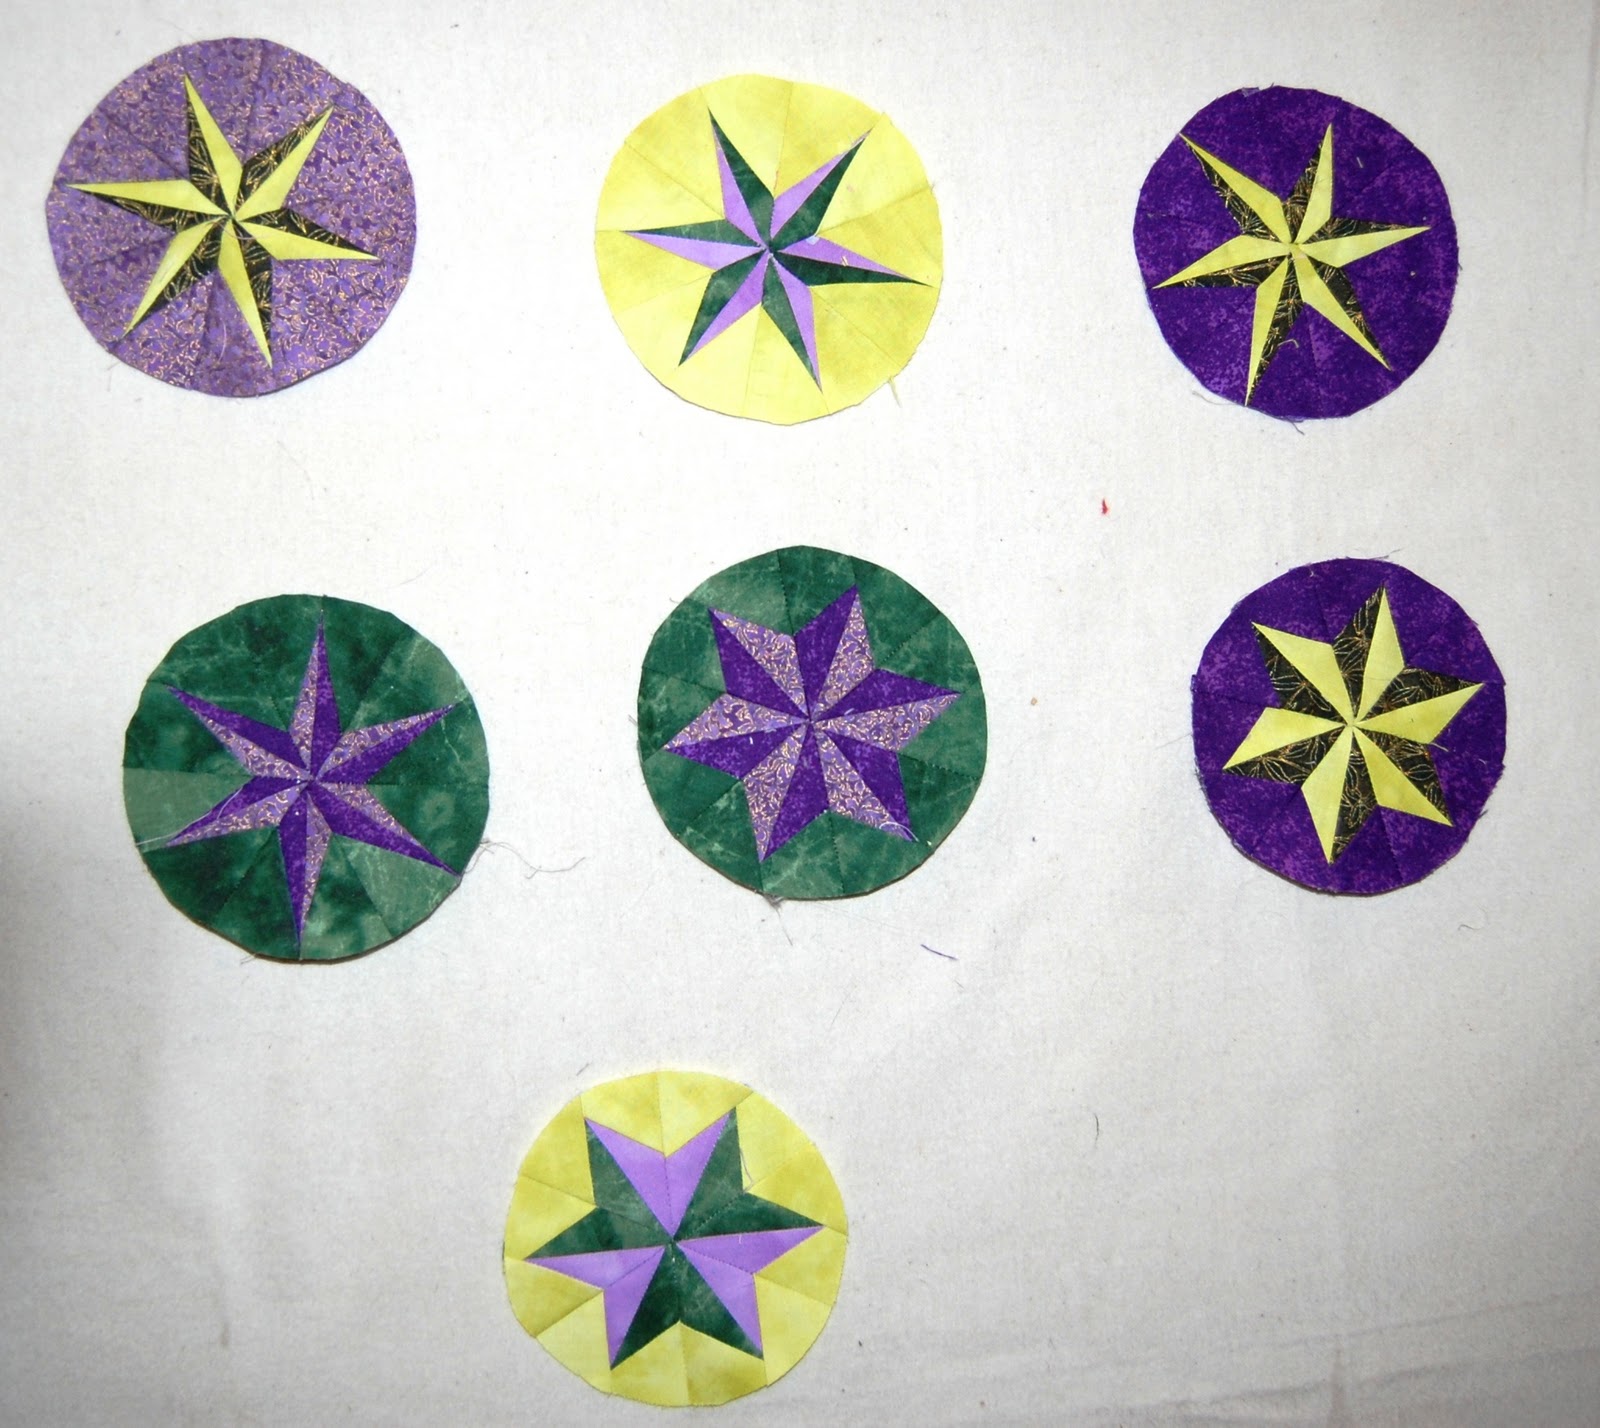
I took a Mariner’s compass class there that spanned over two weeks.  Janelle was the instructor.  Note:  she showed a bunch of samples at the beginning AND has a quilt hanging in the shop; she does excellent work.  I wrote about this class in a previous posting.   Yes, I know I promised pictures.  The block is packed up, in the trunk of my car, from the Friday night sewing that I did NOT go to…. I’ll unpack tomorrow.

Janell was knowledgeable, thoughtful and skilled.  I really enjoyed the class partially because of her and partially because of the group. 

People talked to me, we shared tips and tricks, as well as kid stories and complaints about husbands.

I like to use a tweezers for removing paper when paper piecing.  I’m largely self taught and just started doing that.  Sometimes NOT reading something in a book or being instructed on technique teaches you some things that are off label solutions.  I shared my tweezers with the woman next to me and she really like the tip!

Later in the evening, while I was packing up, the same woman returned my hand needle to me.  Apparently she or someone else through her, had borrowed it while I was looking through the store.  She also said that they’d borrowed my tweezers again.

On the surface, this seems a little like taking without asking, and that I should be bothered…

Oh no, quite the contrary…..

This was me being accepted by the group!

The stuff was in the open, and it wasn’t like they were using up anything – this was tools.  I love to share!  I love being valued!  This was great; I wasn’t the awkward new girl (woman) sitting off to the side.  I was one of the group and they felt comfortable using my things.  I’m sure they would have asked had I been at my seat.

Where was I though?  I was tromping through the store looking at things.  And buying….

I’m taking classes to use up stash.  In one of my BOMs, I’ve sworn to ONLY use existing fabric (see this post), but there I am buying more?!?

Bear Patch has a TON of the Stonehenge fabrics.  I really, really want to make something with it.  I saw a class (hang on, I’ll mention it in the next section) that called for 24 fat quarters.  So, I bought them.  Now I have to take the other class.

I’m hesitant in buying anything else at Fat Quarter Quilting (even though I have that punched out discount card) because I really don’t like supporting a business that doesn’t seem to value me.  I apparently didn’t have that same feeling at Bear Patch….


The class that I bought the 24 fat quarters for is a curved piecing class at Calla Lily.  I posted about them last week and their Professional Tote class. 

I had been going back and forth in my mind about taking the curved piecing class.  It’s something I want to do – think outside my geometric, straight lines, box – but its two Wednesday evenings and means taking off from work at a decent time which can be difficult.  However, I’ve put nearly $75 into some awesome fabrics – I have to do it!

I called to the shop and got Kathy.  I asked if there was still room, and mentioned that I’d been there the weekend before for the Professional Tote class.  She stumbled a moment on my name, but REMEMBERED who I was!!

Oh, that just thrilled me. 

That shows that the business values their customers.

Conclusion

I’m looking for more classes at Bear Patch and Calla Lily.  I’m valued at them.  Fat Quarter… jury is still out, but it’s looking pretty bad.