Saturday, January 12, 2013

First Post of the Year


New Year’s Eve was spent on the couch… as was New Year’s Day….

Sick…..

Icky

So, this is really the first time that I have had the time to write, and the energy, and had things to write about.  I finally got to the studio again to both pick up things to show and to create new.

Where is My Focus?
The last couple months have been bad, good, and everything in-between.  It has been an emotional roller coaster for a variety of reasons and I have also been dealing with some health issues.  I will spare details because this is my art blog, but suffice to say, all of that has put a damper on both my prolific crafting and my ability to design/create.  The ideas are just not there, nor is the ability to concentrate for long periods of time.

I have largely put aside quilting until some of this passes.  On NYE, I played around with polymer clay.  I tried baking some of it, but I was not happy with the results so I am not going to show those items yet.  I think I need to get a proper clay oven, rather than trying to use the toaster oven.  I think hubby will be pleased with that as well.  He was the one who had to clean the oven…

Beading/jewelry work and going to the glass studio have been most of my efforts.  They are both mediums in which I do not need to do a lot of setup or cleanup, and have projects that take shorter bits of time.  The polymer clay was fun to play with, but it takes longer to make things.  In fact, I have a project stored in a plastic container that is only about half done.

So, as a result – lately I have been experimenting.  Some things I have been trying:


  • Combining some of the glass pieces into necklaces (showed last post)
  • Cutting copper foil into shapes and putting in glass
  • Twisting various metal wires into shapes (scrolls) and putting into glass
  • Twisting copper wire both into shapes (in-between glass) and bails (sticking out of the glass) for a combo effect
  • Millifiore jewelry (see here for various millifiore pictures)
  • Doing things with my torch work beads
I think I have written about glass and COE (coefficient of expansion); how there is 90, 96 and 104 glass and you cannot mix them.  The first place that I did studio time at used 90 so I bought a bit of that.  I also bought a lot of economy (read:  cheap and poor quality) 90 from the glass warehouse.  Since that original time, I have determined that I want to use 96 (and 104 for the milliefiori and specialty).  However, I have a larger than useful collection of 90 and want to use some of it up.  To that end, I have just been doing random pieces based more on experimenting with shape, size, placement, etc, than trying to design significant pieces.

The result is some interesting things.  Some of the glass is doing what I think it should, and other pieces are not.  The most interesting part is some glass from the “economy” pile.  I have made a couple pieces in which it’s a single layer with some things put on top of it.  By theory, it should scallop more than it is at the edges.  I think the glass is just so crappy and improperly made that it does not behave as I expect (and as I see in other, better quality, glass).  The edges are not rounding as glass does either.  It is creating some interesting pieces.  One thing that is working as expected is color blending.  I am learning a lot about clear, opaque, semi-transparent, etc., and how the colors behave with each other.  That is all learning that I can carry over to better quality glass.  None of it is a waste.

Metal is a new one on me.  I like multimedia effects but have been a little afraid to try things.  I bought copper foil MONTHS ago, and finally tried it out.  Now I have to think of more things to do with it.  It worked out well (I have showed some pictures here).  I then tried wire.  I twisted copper and steel wire into scrolls and tried them out in a few glass pieces.  The 90 COE was used, and they are in the kiln now.  I hope that they will turn out and I will post them here soon!

Then, today I was looking around the studio a little and saw something else with wire.  The wire was both part of the design and the “bail” for the pieces.  I twisted some copper wire into some fun shapes, and then twisted a loop at the top.  The loop sticks out of the two layers of glass.  We will see how that turns out too!  I am pretty excited.

Pictures
Since I am in my “experimenting” stage, I am just going to throw a few pictures out there, say a few words on each, and end this post.  I have a couple nice pieces I did, but I do not have pictures yet (I want to take them outside in the sunlight, rather than the crappy indoor winter light). 

Finished Glass and Enamel Pieces
These pictures are pieces that I have already shown, just with do-dads, bails, chains, etc.  Nothing much to say here…. Just look!


A little Touch of Steampunk
This is a piece put together with some charms from Joann’s and a little bit of chain.  Nothing special, but something I hope to use in costuming.


Beading
Three pieces to show here.  The first is a long necklace put together with torch work beads I made and some little beads in a neutral color. 

The other two necklaces are made from some beads I got at the Original Sewing and Quilting Expo this fall.  They are made out of paper!


Full Fuse versus Tack Fuse
These are two pieces that are made with almost exactly the same except for the firing.  They are both white base with rounds cut from rods put on top of them.  The first one is a tack fuse – just enough firing to hold it together and smooth out the edges (not rounding them).  Each piece in the arrangement remains intact and separate.  The second one is a full fuse (it also has some stringers in it with the rod slices).  The full fuse totally melts everything together and flattens the pieces to one mass.


Experimenting with 90 COE
This piece is strips of an expensive hand rolled glass (the pink/mauve) next to black strips put on top of a sheet of light/muted yellow.  The two different glasses melted differently and created a ragged edge.  I have thought about grinding the edges and refiring it to “fire polish” it.  My hubby says he likes it this way, so I am going to put it on my table and look at it for a while.


I bought some glass a while back – not quite the “economy” glass.  It is very rough on one side… VERY rough – craters of ¼ inch depth and greater.  I got it in both red and black.  I have shown pieces of it before here in the blog.

This is a small plate made of the red.  I have put clear glass on TOP of the roughness which created a great many bubbles.  I love this effect!


In this piece, I put a black glass beneath the smooth side of the piece.  The top is textured, but smoothed out from the firing. 

These two plates are made with the 90 COE.  The bottom is a single layer of glass and then squares were put on top.  This is what I talked about earlier with the bottom NOT scalloping or rounding as expected.


90 COE Jewelry
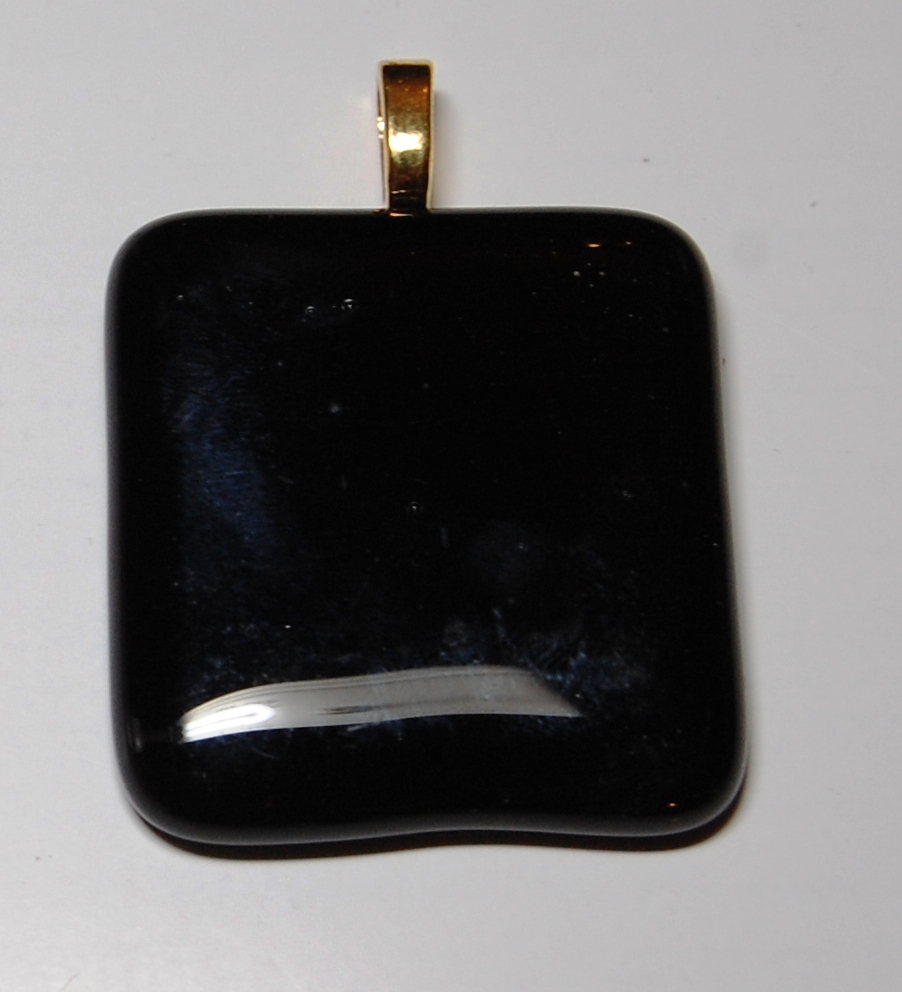
These are all pieces with the 90 COE that I will use for jewelry.  The blue and deep purple bases are like the pieces above where the edges did not round nicely.  I need to grind the sharpness out of them a little.  The pictures show that grinding which will be negated when I rub and polish them a little.  I just took the pictures a bit quickly to post today!

Two Pendants

 Necklace “Beads”

 Earrings

 
 Pendant


Pendant
More 90 COE Jewelry
These pieces are made with nicer quality 90 COE glass.  I think that each piece is going to be a personal piece for my family or me.

Simple Pendant – This is made of a little scrap of an expensive glass I use in leaf bowls.  I am going to put a bail on and then…?


Dime Heart – What do I mean?  This is a neat piece.  Someone else cut a heart from the center of a dime.  I took the scrap that she left and put it between white and clear glass.  It did some interesting things.  First, it separated out a little, but the interesting bit is that it created a BIG bubble in the center.


The Nice Glass – Pendant Set 1
I bought a really nice piece of mauve/white hand rolled glass.  I am going to show some things with it later, but meanwhile, here are some of the scraps made into jewelry. 

This set is made with odd bits and pieces of 90 COE glass. 


The Nice Glass – Pendant Set 2
This set of pendants was made for gifts.  Each one is made very simply – a base glass covered with the good glass OR the good glass as the base covered with clear.  Some of them are made with fiber paper to create a chain channel, and others will have bails glued on.  I have pulled out a couple individual pictures to show the glass. 


Best for Last!
I made another 8 x 24 panel.  This is made with all 90 COE.  There is one funny thing about it – see that pink in there?  It is not supposed to be pink.  When I put it in, it was clear.  Somewhere in my collection, I have some color changing glass and I do not know which it is!!


Saturday, December 29, 2012

Putting it All Together


I wrote a HUGE post yesterday, and took ALL my surfing time doing so.  I have other things I want to do online, but I just MUST talk about one piece I finished today, so here I am again.

This really will be kept brief!

I fuse glass, I bead, I do lots of things….. I am now starting to combine them!

You have read my stories about millefiori and fusing, and my stories about beading… well, here is a new twist!

mil·le·fi·o·ri
noun /ËŒmilÉ™fēˈôrÄ“/
A kind of ornamental glass in which a number of glass rods of different sizes and colors are fused together and cut into sections that form various patterns, typically embedded in colorless transparent glass to make items such as paperweights

In August, I bought a bunch of millefiori from Murano Millefiori.  I talked to the woman who owns and/or runs the place and she seemed very nice. 

Also in August, I created a bunch of fused pieces with the millefiori.  You can read my August 12th blog post for more of that story.  Here are some of the pieces that I created:


My original plan was for the matching pieces to be earrings, and the single piece to be an accompanying pendant.  Simple, but nice.

Over the last week, I took those pieces and put bails on them.  Somehow, I started thinking about trying something and played around with putting two bails (one on each side) of the matching pieces AND one a couple other complementary pieces that were also supposed to be earrings.

Today, I made a trip to Joann’s and bought some findings.

A few wire cuts and twists later….


I can find a dozen flaws with it – including that I used the wrong COE glass with the millefiori and there is cracking.  However, my favorite millefiori place is now carrying 104 COE (same as the millefiori) sheet glass!  Small sheets, but I’ve ordered a bunch of them.  Millefiori jewelry coming soon!!!

Do I Really Have to Clean Up?

Not a Cat Picture
My cats are my babies… but this is a real baby! 


Cassidy Hope Flores – born 12/13/12.  The proud mommy is my lovely daughter Elinor.

Do I Really Have to Clean Up?
AKA – differences between home studio and using studio time at a professional studio.

It is no secret that I have many hobbies and use a LOT of the space at my house.  For example:

  • My fabric collection is in the basement – lots of shelves and well organized
  • My thread collection is also in the basement – rolling bins, color-coded, etc.
  • The embroidery machine is in the basement
  • The office on the second floor has shelves – lots of them – and the shelves are full of bins of crafting items, and art supplies.  There are even two cardboard literature racks which hold (one each) paper and instructional booklets
  • My extensive bead collection and supplies are binned and sorted in the office as well
  • If I count reading as a hobby, I have to list the library, the shelves in the living room, front porch and bedroom where all books are organized by genre and author
  • My polymer clay supplies are binned and in the server in the dining room
  • The findings and accoutrements for glass jewelry are binned and also in the server
  • The dining room tables serves as my primary sewing locale


And so on….

BUT…..

What didn’t I list there?

Glass….

Plan was to be buying a kiln shortly and setting up a studio in the basement. 

However, I am neither ready to buy a kiln – I have so much more to learn – nor am I sure that I want a glass studio in the house.

Why?

Glass is messy and dangerous.  Yeah, I step on pins sometimes in the house, but that is nothing compared to little glass shards everywhere.  I drop pins occasionally – it is not a pervasive action – but glass pieces go everywhere, always, when you work with glass.  There will be dangerous scraps everywhere.  Sure, when sewing there are bits and pieces all over the place, and I am constantly pulling threads off my clothes days and weeks later, but those do not cut you!

Therefore, my glass is all sorted by COE and color, and binned.  It is stored in the trunk of my primary vehicle (which changes by season).  The studio I prefer for open studio time is located within 10 minutes of my office and that alone makes it very easy.  My common routine (it is even on my Google calendar as a standing appointment) is to leave work on Fridays and go to the studio.  I work there until they close – 9 PM – and use their kilns.  I do not think her prices are unreasonable, and it is a social time for me.

Social time…

I am social impaired; I do not have enough friends.  I value my quilt group more for the camaraderie than anything else.  If I were to work with glass at home, it would HAVE to be in the “pantry” room in the basement.  It would have to be someplace where I have the ability to shut a door and keep some semblance of containment.

And I would be alone…. At least when I sew, it is at the Dining room table and my hubby is usually nearby.

Only downfall I see is the need to clean up.

Glass is heavy, and true to Mary habit – I have a LOT.  I need a palette to work with… who knows what I will feel like what day?

So, I get to the studio, haul it in, make a mess, and then have to haul it out.  At some point, I also need to clean up.  I get wrapped up in things, and often I look up, realize its 15 mins to close and that I still have to load the kiln, clean up and pay.

Luckily, Karen who owns The Studio at Rush Creek is a wonderful and patient person.  I have pushed her time boundaries a few times…..

In contrast, at this very moment, my coffee table and the floor space around it are covered with beading items, and there is fabric across the dining room table….  I am so lucky I live with a very patient and tolerant man! 

I think he knows that if he complains too much about my creative messes, I will make him organize the car parts in the garage….

Beading
Since I just mentioned the beading mess, I will start there.

Beading has been a serious hobby for about 20 years.  I’m sure I strung some beads in school, but it was about 20 years ago that I learned how to bead weave with seed beads (Native type style) and then moved on to bead stringing, and a little wire work.  Still working on wire wrapping, but I will get there.

I maintain a large collection of beads from seed beads to gemstones and many other things.  I am good at beading, but not great.  I tried doing some craft shows with them many years ago, but the mass/third world produced goods are much cheaper and better made.  Also, while I am creative, I am not at artist level with bead work so I will leave that part up to those better suited.  So, I make stuff for me and for friends.

A couple times a year, I get a craving for beads and I buy a bunch.  I make some pieces for myself and/or for others and set it aside for a while.  I have two friends who are also into beading and we have done one beading work day and I want to plan more.  Again, the camaraderie is good.

I have also started trying to make more complex pieces out of some of the glass pieces I have put together.  I made a few beads/units (don’t know what to call them) with the specific goal of putting them together into more of a necklace than just a simple pendant (look at the bottom of this post for a link to pendant pictures).  I glued bails on to a lot of the pieces the other day and started putting them together.  However, I found that I need some large jump rings and other findings.  Shoot… have to make a Joann’s trip…. Dang it anyway….

Where are my coupons?!?

Recent Beading Projects
Here are some of the projects I have worked on lately.

Kitty Cats


There are two “beads” that I picked up at a show.  I think that they are meant to be pendants, but I wear big earrings so I got two.  They are also PURPLE!  I did make sure to attach the ear wires opposite on each, so they’ll be one sided – different for each ear – and the cats will face purple side out on each ear, even though they’ll be facing opposite directions since the beads are exactly the same (no L and R….).

Orange Beads


These are five beads that I made in my torch work open studio time.  As I have mentioned before, I have no real abilities with torch work, but enjoy playing.  I have NOT been able to create two – much less enough for a necklace – identical beads.  So, what do I do?  This is one answer – take a bunch of the same color way and create a unique pendant

Earrings


This is another solution to lots of mismatched torch work beads – just go with it… close enough!

Amethyst Bracelet


Ok, I cannot take a lot of credit for this.  I bought this years ago in Florida, and one of the stones fell out.  My son actually managed to find the stone in my car!  I have had it all in a baggy for years, meaning to take to the jeweler. 

I haven’t gotten to it…. For years….

I have also bought a bunch of gemstones and settings in recent months and plan on putting them together.  Duh, I should be able to fix this if I intend to do them from “scratch”!!

So I did….

Hopefully it stays together!

Enamel work #1

In this post, I discussed an enamel class that I took.  I have finally put some of the pieces together into necklaces.  This is the first.  The large disc is enameled.  I put a hole on top and a hole on bottom.  I put a jump ring on top to use for the cord, and there are three beaded dangles attached with a jump ring on the bottom.  Note:  there are also little pieces stuck into the enamel on the disc and fired.

Enamel work #2


This is three enameled pieces – two discs and an asymmetrical ring – attached via holes and jump rings and a bail on top.  I chose to use a simple beaded chain for this one.

Beads with Wire Work


This necklace and matching earrings are made from beads put onto head pins and linked together with eye pins.  I then put chain lengths on either end of the fancy pieces.  I wore this today; the longest dangle sits into my cleavage – at about the lowest point I dare go!

Polymer Clay Piece


This is a 1½ x 2 inch piece of mixed and flattened polymer clay.  I coated it with future floor polish after baking to make it shine.  I put a simple bail through the hole and put it on a chain.  Nothing of technical quality or expertise, but it has the funky artist look and I had fun wearing it with the mismatched bead earrings.

Planned Beading Projects
There is still a huge mess in my living room and I am working on a few more things with my torch work beads.  I have got a couple enamel pieces to sort out, some large glass necklaces to work when I get the findings, but the one thing I want to talk about it my long necklace in process.

A few months back, I bought a long – and I mean LONG – necklace from my favorite eBay seller.  It goes to my waist.  Its 6 inches of little beads, then a large gemstone bead, repeat.  Then little beads are symmetrical, same, organized, etc., but each large bead is vastly different in shape, size, and color.  I wear it with simple dresses and usually loop it twice. 

I've taken a huge liking to this style, and have made several long necklaces out of craft beads from Joann’s – each themed in color.  The other day at a more upscale bead shop, I found a bunch of approximate 3 mm roundel beads in a light sea foam green on the clearance table.  They may be gemstone; they are at least rock or crystal – not plastic.  Each strand of 6 inches was 75 cents.  I bought a bunch, sorted out my torch work beads, pulling out the green based ones, and started stringing them.  My plan is 20 of the roundels, then a large torch work bead.  I will post pictures when done.

Another Use for Torch Work Beads
Last bead story and I will move one…

Promise!

A friend came over on Tuesday and brought a card game called “Lunch Money” for us to play.  It is quite amusing; you have action cards on how you will beat up other players.  There are also cards to block, dodge, etc.  Upon losing an encounter, you also lose “life points.”  The last person to lose all their life points is the winner.  Each player must have 15 counters for their life points….

Yes, I brought out my container of torch work beads and we all used those for counters!

It was amusing to watch two fully-grown men playing with pretty beads…

LOL….

Bad Glass
Or should I say “Bad Artist”?

I should not blame the medium; it’s only doing what it is designed to….

Go to this post, and search or scroll down to “millefiori Pieces”, read the first two paragraphs, skip the bullet list, and look at the two pictures of black and white pieces.

One cannot mix glasses with different COEs.  You can get away with a little bit – some small millefiori on a large piece, a dusting of powder or frit of a different COE, etc., - but I pushed the envelope… big time.

I dropped two of those black and white pieces the other night.  Not very far – less than two feet.  I have dropped pendant pieces from much higher and they have been fine.  What happened truly illustrates the weakness caused when mixing different classes of glass.


Dramatic isn't it?

Latest Finished Glass
In this post......

Which was nearly a month ago! 

I MISSED the studio so badly… I

 Cannot let so much time go by again….

(Ok, I was sick – twice, and holidays, and work….)

Basic Pieces
My concentration last time at studio (and this time) was to use up a lot of the “lower class” pieces of glass I have in COE 90.  These are a bunch of small sheets that were bought at a cheap price at the store.  When bought – the purpose was to build stash and have some throwaway piece for experimenting.

And, just like fabric – I have learned that there are some definite different qualities to glass….  Some of it is crap.

So, I’m trying to use a bunch of it up…making a small thing one studio night to see if the glass is ok, then using the rest on something bigger the next time.

Green Pendant


A simple pendant with a couple greens… success

Purple Dish


About 7 inches, a couple purples, some white.  Mostly a failure… the glass is ok, but there are gaps in color, etc.  That is what happens when you do something quickly and skimp on technique. 

Purple and White Strips on Green


I think this piece is cool.  I need to name it something to belay that.  It is not the highest quality of workmanship, but it looks neat – much neater in person.  Very much a success.

Blue and White Dish


This piece has flaws, but is really cool looking.  The blue base is a single layer, but it did not scallop up (pull in) as much as I expected.  The corners got a little sharp and I sanded them.  Pretty much a success.

Trivet?


This will be going to Ana. 

Why?

A few months back, I played with different COEs (putting millefiori on pieces).  One piece, I put way too many millefiori on AND had it slumped into a square in square rather than a sushi shape (sharp corners rather than gentle sloping). 

It cracked….

A couple bad gaps….

Ana took it home.  She said that anything I gave her in glass would eventually be broken by the cats.  So, that way, she got to look at and display a piece of mine, and then not feel bad when it broke.

Which it did….

There are many flaws on this one.  The light turquoise colored glass melted funny and looks gummy.  It is really not a great piece.

Therefore, it is time for a new piece for Ana.

Oh, and I rate it a failure.

Green/Purple Pendant


I used fiber paper on this to make a tunnel for a chain.  I like how much it pulled in.

Copper
My other focus on the last studio day was to play with copper.  It MUST be put in-between layers, so each of these pieces is a colored glass with clear on top.  I used a thin copper sheet and cut shapes from it.  The copper was thicker than tin foil, but not too much.  Not quite as thick as cardstock.  The copper changes color when fired – all metals do – and sometimes it looks reddish, and other times bluish.

Amber Waves of Green


There is a little red tinge to the copper here.  This piece is about five inches.  I cut the waves from the copper sheet – very carefully.

White Copper Pendant


This is just some random shapes from copper on white glass.  There is also a fiber paper tunnel for a chain.

Hand Rolled


For this one, I used one of my last pieces of the hand rolled very expensive glass from this post.  I put some squares of copper on it, and covered with clear. 

It is hard to see in this picture (I really have not figured out how to take good glass pictures inside), but something occurred with the glass in firing – there is a whitish ring around all the copper pieces.  I swear that is altered from the original composition of the glass.  This type of thing does happen – glass does odd things at very high temperatures.

Hearts


Copper hearts.  This is going to be a pendant.  The hearts are quite red against the white.

Star


This is also going to be a pendant.

Spoiled Me
So, I was off work early yesterday and decided to stop at the glass supply store.  Since I am trying to finish off my stock of 90 COE glass, I needed to get some clear and white in 90 (base and topper).

That’s all I needed…

And that’s all I bought….

Really!

Don’t believe me?

Well, you should not!

Do you really believe that I could walk into a hobby store for ANY of my hobbies and get ONLY what I NEEDED?

ROFLMAO….

My purchases for the day were:

  • Bead release – ok I did need this for torch work
  • A couple dozen 104 COE torch work rods – sort of needed.  I have a lot of fancy rods, but am running short on basic colors.
  • Bead wire – YES, I needed this.  Was going to stop at Joann, but they had it too
  • Some amethyst and green (mentioned above) spacer beads for with the torch work beads
  • White, black and clear in 90 COE
  • Some sale and discounted glasses in 96 COE, including a really cool green piece – swirled.

And….

Hangs head in semi shame……

A REALLY expensive piece of mauve/rose/white hand rolled glass…

It is absolutely gorgeous!

And, did I mention it was expensive….?

I wanted a treat, and the piece just called out to me.  It matches the general color of my dining room…. Ok, that is an attempt at justification…

I am going to make pendants for the cafeteria ladies at work….  Yea, another justification…..

I will have pictures hopefully in the next blog post, but I put together several pieces – including another leaf bowl – featuring the hand rolled glass, AND put together a bunch of jewelry pieces.

Pendants
Most of what I have done with glass is to make pendants.  It is a good way to test color, technique, placement, etc.  I have learned a lot about what glass does – especially in the kiln – when different things are done to it.

A couple days ago, I pulled out all the pendant pieces I had - including my own use ones from my jewelry box, attached bails (to those without) and took pictures of them.  They are not the best pictures, and there are some missing – from pieces I have already given away – so it is not a complete record.

There are a LOT…. This is already a huge post.  If I put the pictures here, I’d double it.  Click here for my photobucket album with the pictures.  Keep looking – I’ll add descriptions at a later date.

ALL of them are available!!!  I will gift and/or trade – see the rules below.


  • If you are a friend reading this, and want one – send me email.  It is yours.  Rules – you have to take a picture wearing it for my gallery.
  • If you are not someone I know, and would like one – or many – I BARTER!  I love to trade for things.  Pretty much anything… just ask.  Handmade soap is top of my list, unique baby clothes, other artwork, handmade paper products, etc.


Sunday, December 23, 2012

Christmas Means Socks to Me.


I believe I have posted before about our annual Christmas project.  Indulge me though, let me tell the story.

History

Somewhere around ten years ago, I worked for Piper Jaffray and I headed up a lot of their volunteer efforts.  This was well known around the company.  Adopt-a-Family was one of those events.  I’ll spare that explanation – look it up if you need.  The fact you should know is that all donations are gathered, and presents bought weeks before Christmas.

A day or two before Christmas, as I was walking through the building, a pretty high level broker stopped me and gave me $200 cash…

“For Adopt-a-Family” he said

“Oh, that’s all done” I said

“Do something with the money”

“What?”

“You’ll figure it out; I trust you”

Okaayyyyy

“Think” I said to myself….

The Union Gospel Mission is near my house.  I've supported them in many ways over the years.  Since they only serve adult males, they can take open food.  Many times over the year, I've brought them serious leftovers from meetings at the businesses I've worked at.  One time, I carried THREE FULL SHEET cake boxes full of pastries to my car…. 8 blocks…..  Another time, I put popcorn, pretzels and cookies from bowls (FULL bowls) into plastic bags and dropped them there.  The men love the food and are appreciative.

In the years that I had been doing community service work, I had learned that there are Christmas present programs for families, single parents (both male and female), children, and even adult women.  However, I've never seen a large scale program that supports gift giving to adult males.  So, I decided that that $200 was going to adult males.  Little did I know that it was the start of something long term.

I called over to the Target store next door to my office and asked them to put together 40 - $5 gift cards for me. 

Yes, I called ahead. 

I did NOT show up at an overworked cashier wanting FORTY cards activated on one of the busiest shopping days of the year!

Now that I've been working for Target corporate for a few years, I am even gladder that I called ahead!  I would have been embarrassed if my current coworkers found out I didn't!

On Christmas Eve, Chris, the kids, and I went to the mission and handed out the cards.  We couldn't give one to everyone, but we got quite a few people.

One man looked at me, looked at the card, looked back at me and said….

“Thank you, now I can buy socks”.

Socks….

Yes….

Socks….

I recently cleaned out my sock drawer.  I could wear a different pair of socks each day for several months without having to wash anything.

It’s shocked me.  It’s a line that floats in my head and I've never forgotten.  I can do a Sheldon Cooper and tell you where I was in the building, the time of day, etc.  (I just can’t tell you what the man looked like because I don’t do facial recognition).

I discussed with my husband, organized and by the time Christmas rolled around the next year, I had 30 dozen pairs of socks on my front porch and a plan.

In short, we put together and wrap 75 present bundles for the men at the mission and hand them out.

We started with 100, but we had a lot left over.  We settled on 75 after two years, and have stuck with it.  One year, we had way too many and went to another shelter with the extras.  Big mistake.  The men at the mission are grateful, thank us, and are polite; that was not the case at the other place.  We decreed that we would only do this project at the mission from then forward.

The Contents of the Bundles

Main Items

It’s changed over the years, but there are three main items that go into the bundle:
  •  Socks.  This started it, so of course socks!
Buying the socks has changed over the years.  A couple years, I bought from a whole sale place online.  One year it was a great deal, the next year the only deal was a box of socks that we had to match ourselves, then the next year it was a good deal again.  Another time, we had a lot from previous years, so we paid retail at Wally World to supplement.  Last year, a quilting buddy Jo Ann joined us and brought about half the socks.  This year, she bought the socks herself; she found an awesome deal at another online place.
  • Scarves.  Fleece scarves actually, all cut out ourselves.
I buy remnants of fleece, and sometimes yardage, from Joanne’s and cut out scarves that are width of the fleece (about 50-60 inches) and 6-9 inches wide.  It all depends upon the size of the pieces that I have.  The scarves are simple, but warm and effective.
  • Candy.  Everyone needs a little treat!!!

Other Items

Over the years, we've added other things to the bundles as we've had money, ideas, been given things, etc.  Some have been hits, other times they weren't that great

Good:

  • Razors
  • Toothbrushes (Jo Ann found an internet deal and handed them out to trick or treaters too!)
  • Towels.  Ana found towels on Black Friday for a really cheap price.  Chris refers to them as “hotel towels”.  They are not what spoiled me would have, but they are full sized, white (white is the most absorbent color because it hasn't had to absorb dye) and not too plush, so lighter weight/fold up well.
Maybe:

  • Playing cards.  I got a ton of them from thrift stores and dollar stores.  It worked out to be cheap and I have seen mission residents playing cards.  I've contemplated going to the Casinos to get on their donation list, but I know some people object to cards and the Mission is a religious organization.
  • Washcloths.  We did towels this year, and I’ll let you know how those go over, but men with a nomadic life often don’t need extra items, and, face it, 99% of the washcloth use in this house is me.
  • Notepads and pens.  Cost a bit, and most people probably didn't use/need.  There’s a lot of free notepads and pens out there anyway
Bad:

  • Knit hats.  A group of women knit 100 hats for us to give out.  They were definitely regarded as “cheesy homemade” items and we didn't repeat that

Financing

We get no grants for this.  Everything is paid for by us.  One year, a friend gave me $50 to use towards the project, but that’s it.  We can afford to buy 75 each of a few items and it goes a long way to our credibility.

A bundle with socks, scarf, candy and misc., is not going to dramatically change the life of one of the recipients.  However, the knowledge that a family (extended with friends now) takes the time to buy, wrap and hand deliver a few items WILL send a good message.

We are often asked “who is this from?”  We are met with incredulous looks and admiration when we tell them “US”.  We get asked “what organization” and other similar questions; and we can see the realization on faces when we explain that we’ve taken time to do this on our own.

Also along that “we care” line – Bags versus Paper.  The first few years that we did this, we setup bags in the living room and assembly line filled them with the items and then taped them shut.

Then came the year that genius me forgot to buy bags.  We had NONE. 

That was also the year that we put off putting the bundles together until Christmas day….

No, you cannot find 75 paper sacks in the Twin Cities on Christmas day.  The only option we found was gift bags at Wal-Mart for about $1 apiece.

Luckily, we (okay, mostly me) are bargain shoppers and hoarders.  In my defense, we have a big attic!  Also, my hoarding came in quite well in this COMMUNITY SERVICE case, so I feel justified!!!

I had stashed several dozen rolls of wrapping paper (bought at 90% off).  It didn't take too long to wrap the gifts.  We’ll admit that the wrapping job wasn't the prettiest…  And, the lack of cellophane tape was mitigated with masking tape from the painting supply bin….

The reaction that we got to the WRAPPED presents assured that we would be wrapping each subsequent year.  The men really noticed that little effort and were touched by it more than even white paper sacks (versus brown).  It also further illustrated that these were personal gifts – us to them.

This Year’s Effort

Jo Ann, her friend Monique, Chris and I spent two hours sorting, organizing and wrapping this afternoon.

A good time was had by all!

Delivery will be sometime after 10 on Christmas Day.

Contents of the Bundles

  • 1 towel (we only had 50 some, so the last few got an extra pair of socks)
  • 5 pairs of socks
  • Fleece Scarf
  • Toothbrush
  • Candy Cane (12 for a dollar at Cub!!)
  • Handful of miniature candies

Pictures

And here are a few shots to illustrate this story!

The box of socks:


Jo Ann (in white), Monique (on the floor), and Chris (backside).  You can see towels, the bowl of candy, and a box of tooth brushes (on the table by Jo Ann)


Jo Ann (in white), Monique (on the floor, mostly blocked), and Chris (backside).  Nice smile on my hubby there!


Jo Ann putting together a bundle.


A view of the table where I was working.  See the wrapping paper and empty rolls?  Also notice the wrapped packages on the chair.


Glass

In one of my September 2012 posts, I discussed the various types of glass and showed my attempts at working with very hard – borosilicate – glass.  You can see that post here.

The efforts were not pretty….

I’ve also discussed a lot about my version of art (very organized, geometric) versus organic art and that I will never be good at Torch Work but that I enjoy it and will continue.

Today, I retook the Borosilicate glass because I felt I needed more assistance and because I got the glass for half price.  Yay Groupon/LivingSocial/etc.!!!  The coupon from one of them is what originally brought me to Potek Glass and I just love taking their classes.  I prefer the Studio at Rush Creek for my open studio time, but the classes at Potek are professional and geared to only glass artists/enthusiasts.

Even if you have to pay full price, I HIGHLY recommend going to Potek for ALL their “Try-It” classes.  They are focused classes and packed with information AND hands on activities.  I've had all their primary instructors; each is different and all are good.  I prefer Annie over the rest; just feel comfortable with her.  She’s a good teacher, a good artist and a comfortable person for me to be around.  She’s not overly social/seeking out conversation as some instructors are, nor does she come across as cold or critical.  Not that other instructors there are – just that I have run into those traits at other places. 

As I've said many times, I have my social ineptitude;  taking classes from Annie is just how I want it – acceptance of personal recognition but totally focused on the class and the information given.  So, I would also say she’s Asperger friendly!! A “good work” comment from her is honest, and she doesn't put me on the spot.  This seems little, but I have issues with “fitting in” at some places (never going back to the Mosaic place – that was all about popularity and “Party” atmosphere).  This was my second time taking the class, and she didn't make any kind of deal out of that.  I didn't feel criticized for needing more help, nor did I receive false praise for my work being a little bit ahead of some of the others (mostly that I could light the torch with the striker…!)

I got a lot out of the class; realized where I was going wrong with some steps and, overall, feel more comfortable with the process.  I think there was a little improvement in the projects done in the class (note: the same exact format was followed and did the same projects).

Before

In my first round of the class, I produced two misshapen lumps that were supposed to be Icicle ornaments.


After

This time, I made three and they – whist still misshapen – actually look like ornaments and are currently on my tree!