Friday, March 27, 2015

Time for Art!

Wine, Women and Work (Art Work!)


To pay the bills, I work in a non-art related profession.  I contract but am a full time, salaried employee of my contract firm.

That means that when I’m not on a contract, I’m not panicked generally… I am getting paid (bench time is the term).

I had been contracting at the same place for almost seven years and I really liked the place.  However, it’s been changing, and the last few months haven’t been as pleasant as most other were.  That’s all I’ll say there.

I knew that I was ready for a change when my high level manager told me (professionally, privately and compassionately really), that my contract was being terminated due to an internal change (nothing I did) and all I could think of was that I hoped she’d stop talking soon because I wanted to get to my glass studio time that was pre-scheduled for an hour after she called me aside.

Yes, I have to find a new contract.

But, I’m still employed and I’m actually welcoming the chance to get some projects done!

Escaping

Hubby and I own timeshare, a points system, and we own a fair bit of it.  Say what you will about it, but it’s served us well and it gives me an ability to organize and host get-togethers with friends who might not otherwise be able to attend such things.

Being timeshare, it also means that we get LARGE rooms – condos – with multiple bedrooms, full kitchens….

….ironing boards (essential to quilting; this will be a point)….

And no daily maid service (that’s actually a positive)

Anyway, why this is important to me and to art (craft). ….

I figured that my first couple of days without an office to go to could be a little disconcerting (more on this later).  I checked the “balance” of points in the system and discovered that I had some that had to be used quickly as our year end is March 31st.  Not using would be a loss.

I’m also really good at finagling the system for the best possible.

We go to the Wildness in the Wisconsin Dells a lot (Glacier Canyon is the actual Wyndham timeshare side, but Wilderness/Dells will show you the property).  Typically, a two bedroom condo is 65,000 points for Friday/Saturday nights.  Since I didn’t have to make it a weekend, I chose Sunday and Monday nights. 

·         Our “VIP Gold” status (told you we had a lot of points there), gives us a 35% discount on points if we book inside of 45 days.

·         Same status also gets us an upgrade to the next size up room, if available.

My points that I had to use just about covered a one bedroom for two weekday nights with the discount (had to take a few from the next use year, but that’s kosher to do).

I then instantly upgraded that one bedroom to a two bedroom.

I “spent” just under 20,000 points for that room!

Reservation in hand, I made some calls….

Ok, I won’t lie…. I didn’t call; it was all over text and/or Facebook IM…..

I’ll spare most of the planning details – the trucks and minivans belonging to my companions weren’t long distance road worthy, our big truck doesn’t have a good backseat and the mileage sucks (it’s for car hauling 
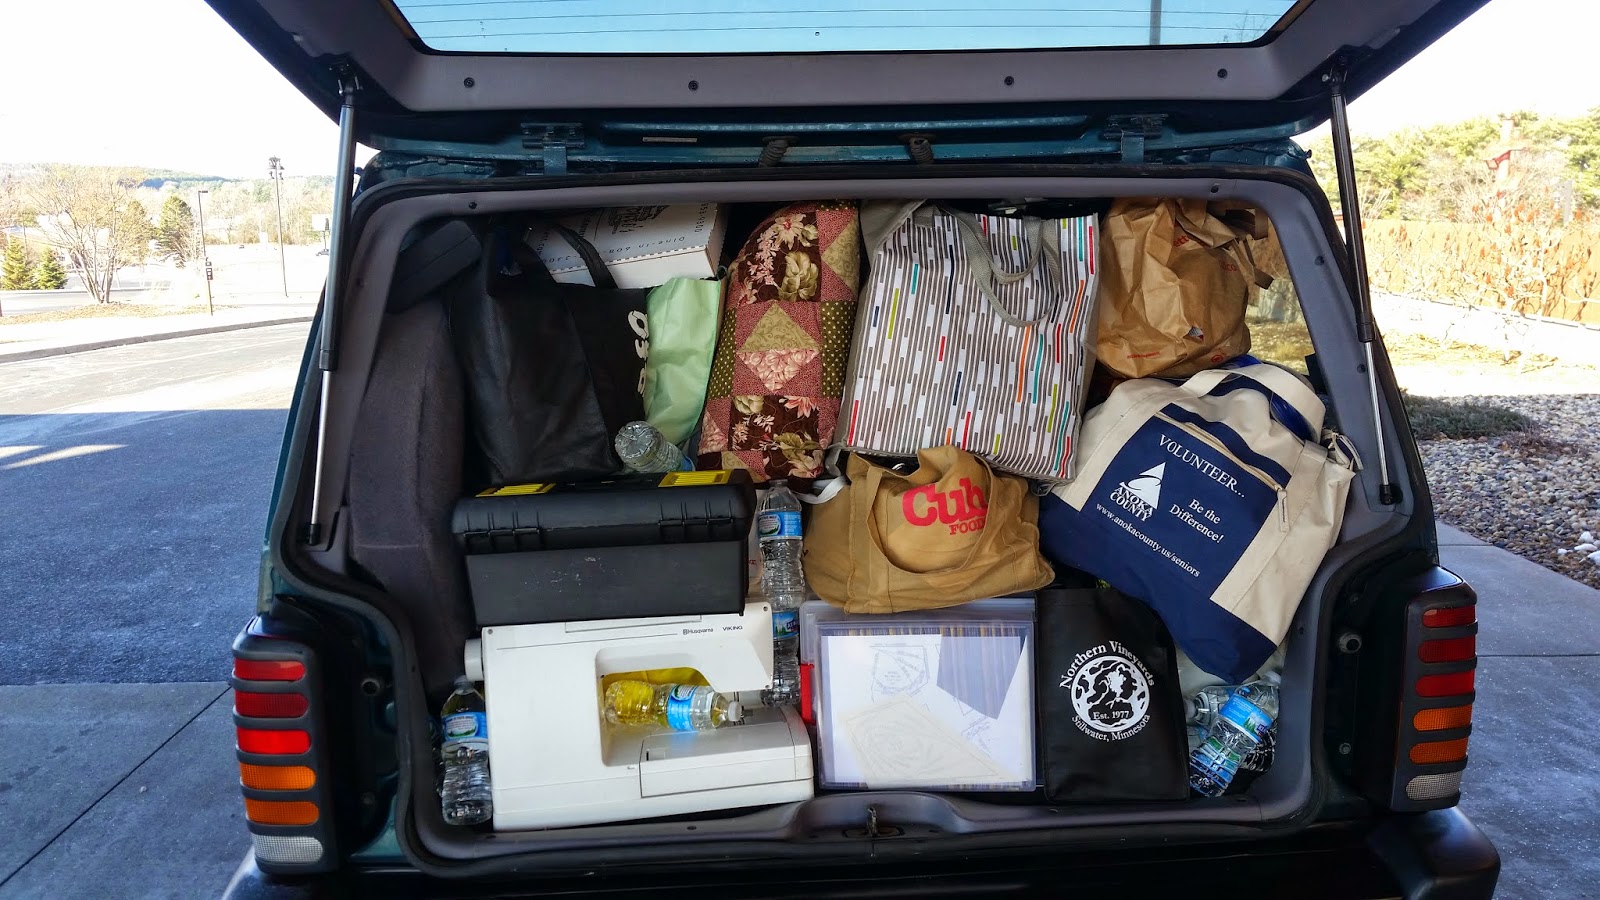
really), and the trunk on my commuter car just wouldn’t suffice.  Through some negotiations and promises of “alternative payment” (got with that however you want!), the decision was made to trade with my OSO Perry for his Jeep Cherokee, stuff four women and enough sewing machines, fabric, beads and food to occupy us and head off. 

The deciding factor on vehicle was that he has a cargo net….

It was used…..

Here’s what that looked like:


My Projects

I brought my sewing machines and several projects.  I actually finished the main thing I intended to and a couple other things!

·         My entry for the MN Quilter’s show challenge.  I will not be showing any pictures of that yet.  I finished the top and now have to lay it out.
·         A runner kit that I bought at a Nancy’s Notions show a few years back.  It’s traveled to several retreats with me and never got touched…. So, high time!

See the pink in the picture? It’s actually supposed to be a pinkish red.  I don’t know where my head was, but I totally horked up cutting the fabric for that.  I dug around in the project bags that I had and came up with the pink… it fit in pretty well.  I think it made the runner brighter.  I tempered that with the brown binding.  That also was my own fabric.  I don’t remember if the kit had binding fabric (probably was supposed to be of the red that I totally massacred with a rotary tool)

The fabrics for the kit were pretty accurate in amounts and nice fabrics…. Except for the backing.  It’s a very thin muslin.  Beige… nothing exciting and, as I said, thin.  It baffled me…. Nancy’s notions is a good quality place, and everything else in the kit was good quality.  While the muslin wasn’t scratchy, stiff or overly sized, it just wasn’t what I expected.

I quilted it with orange thread.  Not sure what you can see in the photo of that, but I think it pulls it in nicely.

·         Table topper of scraps of the above.  No picture yet…. Next blog entry because it’s almost quilted.  Basically, I took some scraps from the above project, made a small block, then bordered it with an orange (same fabric family as the brown actually – quilting classic or something from Connecting Threads) to make it a good size for a small table topper.

·         25 patch 


I've been making a lot with batiks in green/purple/pink and related blends lately (couple years) and had a lot of small bits, especially 2 ½ -inch strips from a couple projects.  I hate to waste, and usually trim all my leftovers like that to uniform widths and roll them onto existing rolls.  I have 1 ½, 2, 2 ½ inch, etc, rolls in blues, greens, etc.  However, these were batiks, nicer, and I wanted to make them stand out a little. 

I've been compiling them into strips of 5 – 2 ½ inch squares and setting them aside.  I counted them up and made 16 blocks – 5 rows of 5 of them, so thus a 25-patch block.  I then dug around in the fabrics I brought (just a few!) and sashed them.  Originally, I thought that would be it, but when I laid the “finished” product out, I wasn't happy… I think it needs more.

And, then, when cleaning up to head home…. Found some more of the strips of 5 – 2 ½ inch blocks…

Not enough for another whole row….

But too many to discard….

Ok, maybe some people could discard them….

I can’t….

So, I set them aside, and I’m going to see if I can find enough same/similar/complementing scraps to indeed add another row. 

The quilt is four rows of four blocks right now.  Each block is about 9 inches, and the sashing is 3 inches IIRC.  That makes a decent sized lap / crib quilt; another row would fit well.

·         Pink stars.  No picture again…

I made 24 paper pieced blocks with pink and green batiks and a white batik background. 

I’m working on sashing them with black.

That combo could be awful…. Or awesome….

I’m currently leaning towards awesome!  I’m doing something neat with the sashing and it’s quite a dramatic look to the whole piece.

The Players

I name people in this blog.  I’m not giving away secrets or outing anyone for anything, but I am keeping it to first names.  You know who you are. 

Pam came with and brought beading – polymer clay beads.  She also brought grown up coloring and has the most awesome collection of pens!

Anna came with and brought crocheting.  She’s starting up an etsy store and making some very precise little things with #10 crochet cotton.

Judi came with and also brought quilting….
I am not alone!

She worked on a “stack and whack” and I stole (ok, she gave it to me) a good sized piece of the fabric to make something.  She used a black backgrounded fabric with yellow leaves, red grapes and some greenery.  It strikes me as a Perry color combination and I may try to make something out of it for him….. as if he doesn’t have enough of my stuff crowding into his space already!

And, here's what it looks like when women get together and produce fantastic art/craft work....


Friendships

I’ve spoken often here of friendships and problems I have with people.  It’s hard for me, and this past 18 months has been some of the worst in my life.  I’ve felt more “Aspie” than I ever have before, shed more tears, and experienced more frustration with relationships than I have for a long, long time.  I’ve walked away from a couple friendships, been estranged (and still am) from my daughter Ana, and have experienced some deep depressions.

In all of that, I’ve also discovered myself in a way I never have. 

I’ve also started “real” friendships with people – especially women.  New friendships and converted existing acquaintanceships to friendship.

Besides being temporarily unemployed as I headed into the weekend, I was also ambulatory challenged.  I wracked up my leg skiing (did NOT break or tear anything though!).

This wonderful group of women took care of me.  They brought the food, they fixed the meals (ok, I ordered the pizza one night!), carried things, supported me, etc. 

They also seemed to all like me.

That still amazes me.

I got compliments…. On my sewing, on my packing abilities, on other things….

I got teased – in a friendly, amusing way – for things that I should be teased for….

I got thanks… and appreciation….

I needed all that.

Thank you.

Wrap Up


Going back to my “resolutions” theme started last entry.

I’m going to write more – soon to come will be pictures of the aforementioned projects.

I’m also going to get a LOT of projects done during my employment search (and after too!).

Today was a productive day:

·         I quilted, attached the binding to, and hand-stitched the binding down on the runner shown above.
·         I attached the binding to, and hand stitched it complete on this topper:


·         Anna came over and we dyed fabric, yard and some clothing blanks from Dharma Trading.  Hopefully I will have some good pictures of those soon!


Saturday, February 28, 2015

Blog Re-launch

(Raises right hand) “I do solemnly swear to uphold my New Year’s Resolutions that I am making now….

Yeah….

Ummmmmm

I do realize that both New Years and Groundhog’s day have been left in the dust…. (And president’s day, MLK, Valentines, Elvis’s birthday…..)

However, a myriad of things have happened lately, some big, some small, but collectively they have told me that it is time to take charge of my life in some ways, relinquish control in others, and just generally to make some changes.

My Quilting/Art/Craft blog isn’t the place to dive deeply into life changing revelations and psychological analysis, so I’ll limit this to “I’m going to write in my blog two or more times a month”.

Men and Art

Brandie and I consider ourselves artists.  She’s a “true” artist in my book.  She can draw and paint things that look like the subject she started with.  Her command of “organic” art is amazing; my art is geometric, logical and mathematical.  I can claim color sense and thus feel I can label myself an artist.  One other thing we share is that we have male partners who admire what we do and are willing to throw their efforts into the mix.

Brandie, Matt (Brandie’s hubby), Chris (hubby) and I went to our timeshare in the Wisconsin Dells (water park resort with a TON of amenities; it’s really a cool complex) in January.  Brandie suggested that we partake of the paint your own pottery establishment inside the complex.  The results were awesome!

Here are our brave menfolk deep in glaze.  Note:  Chris will actually use the coffee mug that he’s crafting! 


Here are the finished products: 
·         The round box and lid is mine.  I have a dots thing
·         The plate in the back is done with a bubble technique that involves glaze, dish soap and a straw.  Also mine
·         The gecko and shark are Matts
·         The mug with the critter (another gecko) hanging on it are Brandie’s.  She also did the bubble technique on the critter.  It’s cool but hard to see in the pix
·         The green medallion in the middle is mine…. Dots again!
·         The blue mug is Chris’s.  The picture doesn't do the layers of color justice
·         The other two medallions are Matt and Brandie’s; I don’t remember who did which ones


And here’s a self-serving photo of just my pieces….


My kiln is capable of firing painted pottery like this.  We find the paint your own places to be expensive, but we enjoy it.  I’m currently trying to start up a mini “Co-op” for doing it here.  If you are interested, either see my Facebook post on it or talk to me.

Never Too Early

I love art ….

Obviously….. Duh…

In early February, I went and visited my lovely daughter Elinor, and her chip off the ol’ block, Cassidy.  One of Cassidy’s birthday presents was a play dough set.  For some reason, she associates that with me…. Wonder why..... LOL

So, the play dough was brought out, and sculpting ensued. 

Cassidy hard at work


My creation…. (Note:  I told you that I am NOT an organic artist)


A couple days after this, I was sitting on the couch working on my laptop and Cassidy once again dragged out the play dough.  As I was actually doing work work on the laptop, she sat beside me and worked fairly independently.  After a little while, I noticed she was chewing on something…. The following conversation occurred (note:  she calls me “Manga”)

Manga:  <imagine a bit of scolding/accusing/firm tone>  “Are you eating your play dough?!”

Cassidy:  <Said with that indignity that only a two year old can pull off, and a bit of a “duh” attitude> “NO”

Manga:  “What are you eating”

Cassidy:  “Chip” (she doesn't form full sentences most of the time)

Manga:  <as I look around> “Where did you get chips?”

Cassidy:  <Doesn't speak, points into the couch cushions>

*Sigh*

Breezy Point Retreat

Valentine’s weekend saw me at a remote cabin in the woods with some of my closest female friends.

Imagine a log cabin, blanketed by snow, smoke from the chimney, pine trees heavy with snow, no one for miles and miles……

*sigh*

OK, so it was really a luxury condo in a large group of condos in a beautiful and well equipped resort.  We had two Jacuzzi tubs, granite counter tops, gas fireplaces, etc…..

The Setting

The fact that it was Valentine’s weekend was simply a coincidence.  It worked out that we could get a reservation at that time…. However, I’ll admit that it was easier being there then trying to decide which of my partners got me for what on the “Holiday”.  While I’m a girly girl who likes dressing up and meals out, and while I enjoy celebrating events and achievements with my friends and family, I’m really don’t get a lot of holidays and find some traditions more obligating that enjoyable.  To that point… Valentine’s Day:

 ·         I have very romantic partners who provide romance frequently; they don’t need a day to tell them what to do
·         I don’t like eating by candlelight (can’t see the food)
·         I don’t want jewelry gifts – I make what I want, and find store prices and/or quality to be laughable at times
·         I don’t like chocolate
·         I’m a reactive hypoglycemic and don’t go overboard on sweets (I’d be sick)
·         We frequently have flowers in the house anyway

The Players
So, instead of feeling like I had to play by a set of traditions, I spent the day, and weekend, with five other women, talking, sewing and bonding.  There’s been a lot of turmoil in my life as of late, and I’m working through some things.  I want to shout out to the five women who joined me that day and thank them for being in my life.

·         Cathy – my oldest friend currently in my life.  She’s my fan and solid supporter.  I trust her with my heart and mind and am grateful she’s in my corner.  I also hope someday she can teach me some garment making skills beyond what I currently have.  She knows more of my history and relationships than anyone else and still hangs around me!
·         Pam – the woman who I've been closest and most open with ever in my life.  She’s my third partner, but not a romantic partner.  I tell her things that I can’t believe I even say out loud, and get advice and camaraderie that I never got from a mother, sister or BFF.  If the men ever knew the intimacies of our conversations, they would blush!  Added bonus, she also does most of the same arts/crafts that I do.
·         Anna – Cathy’s daughter and my “niece” by informal adoption.  Anna is a quilter/crafter like me and like my older daughter, Ana (who encouraged me to start this blog originally BTW). There are ongoing relationship issues between Ana and me.  I miss her deeply and hope that someday those will work out.  Anna fills part of that gap as she sees me in the “parent generation” role and allows me to feel emotion and even craft mentorship to her that I currently cannot with my own daughter.
·         Judi – a long term acquaintance from my quilt group who I feel really moved into “dear friend” category after the weekend.  Over the years in quilt group, Judi has paid me great compliments in asking for my advice and help on projects.  I treasured that for years.  However, this weekend, she showed me how much she cares about me as a person and that hit deep in my heart.  I hope to explore that more.
·         Theresa – my newest BFF.  I've known her a couple years, but only now are we spending time together and finding common ground.  She’s a great cook, and insightful as all get out, and I only see good things for our future. 

The Accomplishments 

We didn't just talk, do our nails and sit in the Jacuzzis…. Art was created!

I haven’t done much sewing lately.  In preparation for this “retreat”, I culled through my project box and started finishing things up.  (Note:  “finish” can also mean taking a pile of fabrics that I set aside for an idea).

Prior to actually leaving, I tried to knock off a few things; get a couple “quick wins” to get me in the mood. 

One thing that I've sat on way to long is a quilt top that Anna asked me to quilt.  Here’s a small view of the quilting.  The quilt is a large panel surrounded by square in square blocks.  The panel is a stylized Christmas tree and I didn't want to lose that with a stipple over the top of it all, so I did some “outlining” of things.


Next, I finished assembling a couple quilt tops that I found in my box. (Disclaimer – they were all pretty close to done already!)

This one was actually started at another Breezy Point retreat.  I made square in square blocks with green and purple batiks, cut each finished square diagonally, then re-sewed them to squares.


I did several batik quilts that used part of a “layer cake” (ten inch squares) of beige based batiks.  I took the remainders, cut them twice into five-inch squares and bordered them with purples and greens from a couple different quilt projects (including leftovers from the above quilt).


This was also done from a layer cake. Each square was different.  I used a patter called the “tossed nine patch” aka “disappearing nine patch”.  I was one or two fabrics short of having enough to do this and grabbed a couple from my stash.  They fit nicely; I don’t even remember which they were!

This was actually completely assembled (top) as I pulled it out of the box.  It’s smaller, and I had been debating leaving it at a crib/lap sized, or bordering it to something larger.  The question was “is it finished or does it need more”.  I took it to the weekend, laid it out, and asked people the same question.  Decision was:  “It’s done”.


This is another one done with leftovers from several quilts.  I had a couple blocks (the pinwheels) done from one quilt.  I hate wasting things!  I took them, and strips from something else, and stash fabrics and made these blocks.  I finished the assembling at Breezy Point and laid it out for a picture and a look see.


Now we are into the new construction.

I bought the swirly fabric – a yard of it – somewhere along the way and I wanted to make something with it that preserved the swirls.  This meant I needed to use larger pieces of it. 

Theresa also loved the fabric and so I had her “design” a small piece that I’m going to give her.  I decided on 8 inch blocks of the fabric.  My plan was to use bold fabrics in either solid colors, marbled, or very small prints to pull out the bright colors in the focus fabric.  Theresa actually went the other way and used very muted fabrics that I’d also brought along. 


I hadn't decided on any pattern for my use of the fabric.  My hope was to somehow get inspiration at the retreat. 

I got it…..

Judi brought along the blocks she was working on.  It was a pattern/technique that I’d never done before.  If I knew what it was called, I would tell you….

I must ask her about that….

I cut the rest of the focus fabric into 8 inch blocks, counted them, then pulled out my brights and started cutting more 8 inch blocks.  I cut one 8 inch strip off each fabric, cross cut it into squares and then counted.  I determined how close I was to a block layout (how many in each row by how many rows) and cut out a few more to make it to that number. 

That’s as planned and scientific as it got!

I used Judi's technique and made this block as a “test”


I sent a picture of it to Perry and he didn't know what to make of it….

“Why is there just one patterned block?  It doesn't make sense”…..

His “Aha” moment came after I made 20 blocks and laid them out.


Now, here’s the funniest part….!

Theresa is not a quilter, and obviously hasn't been to a quilting retreat.  I explained to her the established procedure that quilters in a group setting do with a quilt like this; a quilt made of blocks that don’t have an established order, that have some sort of difference, but are interchangeable as far as size, etc., goes. 

The quilter takes the blocks and lays them out in the row pattern randomly.  All the other quilters are allowed to move the blocks around into what they think the layout should be.  This may take an hour, or a day. 

It’s great fun.  Each person has an opinion.

Theresa learned quickly.  She initially said that there was just ONE move that needed to happen; that two blocks were saturating an area with one color.  She moved them, and then the light bulb went off… “Oh no, that creates another issue”….

I think she spent at least an hour over the next day staring at it and moving things!

Welcome to quilting, Theresa!

The last project I started at the retreat was based on a book: “Bargello with a Twist”, and centered around this example in the book:


Here are the blocks I completed at Breezy Point:  I laid them out at home to get an idea.


By the end of the evening, I had filled in a few things:


I then went to bed...

Remember, I have cats……

They love my fabric…..

This is the view of the same pieces in the morning.


And, now….


I haven’t decided what to do next.  Its lap sized now.  The suggestions I've received are to add a narrow orange boarder and then a thick black border.

My non quilting, gamer friend also have compared this to Mine Craft and/or Zelda. 

Bonus points if you see that too!

Nature's Art and More
Perry and I spent last weekend up on the North Shore at my family’s cabin.  Saturday was a great skiing day and we enjoyed ourselves at Lutsen.  However, on Sunday, the temperatures dived into the sub zeros and the wind whipped it to a -41 wind chill.  Skiing did not take place that day.
As I've mentioned previously, I've been going through a lot of emotional turmoil.  Due to a few factors, I slipped into a bit of a depression and Perry was determined to cheer me up.  Grand Marais has quite the artist colony, it’s a half hour drive from the cabin, and he found out that there was an art quilt exhibit there that weekend. 

“Fortuitous” was his thought and he excitedly share that with me.

It’s was a small exhibit, but really cool and there were other things at the venue as well (glass art, pottery, etc.).

I think I could make something like this with my many batik scraps (and bonus points for the Monet look of it all):


Moving on (and back to Tofte area), another thing that fascinated me was the ice on the lake.  Perry scanned the shore along Highway 61 until he found somewhere that we could walk out onto the ice.

A view of the ice


A view of a small ice “cave” created by the frozen waters

Glass
As I've mentioned in this blog before, I do a couple things in the glass art world.  One is fusing, the other is torch work (making beads from glass rods over a HOT flame). 
My first picture here is a combination. 

Yup…

Really……

Beads break.  Sometimes while working on them, sometimes while annealing in the kiln, and sometimes because we drop them. 

Some people throw them away, others scrub the bread release (a clay that we coat the mandrals with so the glass doesn't stick; usually it winds up inside the bead hole) off and reuse the glass….  I decided to get creative.  I took a whole bunch of my broken beads and arranged them on some clear plate glass.  I’m going to call the finished piece “Mary’s Mistakes”.  Here is a pre-fired picture of it.


Sharing The Hobby
I took Matt, Brandie and Perry to a class at the studio that I spend time at. Then, Perry accompanied me to an “Open Torch” session and tried his hand at beads.  He’s got the concepts down, and just needs to practice.  I’m actually quite jealous of his ability to manage shapes other than round so quickly!  (Although, I’m secretly glad that his longer beads were worked too much and won’t come off/break off the mandrals; I can have him stealing my thunder so quickly!)

Here are the beads he did prior to taking them off the mandrals.  As you can see, there was some kiln breakage.


Here are the completed, removed beads that stayed intact…. WAY better than my first bead attempt!


Tooting My Own Horn
And then here are my beads.  I favor large beads; I also like the “bi-cone” shape, and dots…..

Always dots….

I even wear a lot of polka dots!

One batch straight from the kiln.  One thing I want to point out.  I decided that I wanted to try a particular color of pink – deeper rose, marbled – but didn't have any.  Pink glass is EXPENSIVE.  Red/pink is the most difficult to produce and that drives up cost. 

However, I had some sheet glass in the color scheme I wanted, so I brought some scraps to the studio and played with it.  Because it was sheet glass, and a different COE than Italian soft glass (bead glass), I couldn't mix it with other colors.

Look at the two round beads on a single mandral in the middle/right of the picture (under a green bead).  That’s the glass when I simply melted it and formed simple beads.

Now, look at the grayish bead that’s about dead center/top of the picture (left and up from the bead with two large silver dots on it).  That’s the SAME glass!  It got cloudy and darkened with more heat.


Another batch (poor picture).  The two barrel shaped pink beads are also that same glass – less work, keeps the color.


And here are some off the mandrals….dots, dots, and more dots!

Fire Paper

When you fuse glass in a kiln, it will stick to the “shelf” in the kiln.  To stop this from happening, you need to either use coats of “kiln wash” on the kiln, or put down “fire paper”.  The fiber paper is much easier, but it is single use.  This is similar to the bead release that we coat mandral with when making beads. 

I have a roll of fire paper.  One Saturday I decided to fire something (note:  I’m still figuring out how to use the kiln and have only done a few things).  I worked on the piece, got it all ready and could NOT find my kiln paper.  I looked all around my work room and then at the clock.

The glass supply store closes at 3 on Saturdays, is not open Sundays, on only open until five on weekdays. Since I would 25 miles from it, and a normal business day, this wasn't good.
I went racing up there, ran in the door five minutes until close….

The woman working the counter all but glared at me….

Everyone HATES customers who swing in at closing time!

I assured her I needed one thing and that I would be quick.

I was......

Got home with the paper and heading to the kiln with my piece…..

(Note:  The kiln is in a different room than my work room due to power and space issues)

Sitting on top of the kiln was my role of fire paper…..


Really?!

And I shall end my discussions for the day at that point!

Happy crafting to all!

Sunday, October 19, 2014

Various Art Updates


Book Project

 <jumping up and down!!!>

A master quilter who has published two books already sent out an email to a select group of people - including me – to help test patterns for her new book.  She will be putting many of the quilts the testers make into the book!!!

I can’t tell you who she is, or what the project is, or show you what I made…..

It’s white, mauve/pinks, and greens.  I designed a quilt based on her technique.  The design is my own except for one piece that is based on her technique.  The layout is all mine.  I quilted it on my juki with some fun quilting, and I hand stitched the binding.  The cats helped quite a bit <sarcasm> and I have to put it through a dryer cycle to take off cat hair before I send it in. It’s about 40 inches square.

That’s all I can say…..

Sorry….

I signed an NDA (Non-Disclosure Agreement).  When she published, I can tell you more, and show pictures.

I will have a LOT to say about the whole process and pictures when she gives the “all clear”.  That might not be until spring, or even Summer….

However, I have to share my joy and excitement on this!!!!

Macro Photography

So, this started as my ONLY about quilting blog….

My other art forms quickly migrated in…

Here’s another: Photography!

I have a very nice DSL camera that I bought for myself as a MBA graduation present.  I didn’t buy top of the line, or professional, but I bought a very nice heavy user camera – Nikon D40.  At the time that I got it, Elinor and I were going to a lot of festivals and taking pictures of the athletes.  I wanted something that could take good action shots.  I also bought the first level of telephoto lenses for it.

However, I’ve always loved taking pictures of flowers and plants.  Since buying it, I’ve started to experiment with macro photography and taking arty shots of pretty wildlife (and some not so pretty!).  You can see a vast sampling of my attempts on my photobucket in this folder

Filters

Recently, I bought a set of filters for the camera. 

I have no idea what to do with them. 

I’ve carried them with me on a couple trips and they remain in their original packing.

I do this sort of thing a lot – I get very excited about something, buy the equipment, read about it, and then get scared to use it (see a later story here about wet saws).  It then sits for the longest time, and finally, I get the courage…..

And discover how easy it all was and feel like a fool!

So, to that end, Perry and I have plans to go to the Como Park conservatory (it’s indoors), and just spend a day shooting.

Wish me luck!!!

Care and Maintenance

I take pretty good care of the camera.  I have a nice, big case for it.  I have a couple card readers that go into a pocket, the charger goes into another (haven’t lost it yet!), and I even have a spare battery for it (especially needed since I have a habit of leaving the camera on).  I actually keep them charged. 

But…. I lose lens caps….

A lot….

This time, I got smart, and I bought five (so I could have backups)

However, I also bought the strings to attach them to the camera.

So, now that I have four backup lens caps, I’m not going to lose the one that’s attached for some time….

*sigh*

Glass

Beads

I am getting much better at making beads…. Really, I am, and I believe it!  I have faith in myself on this one thing.

When I first started making beads, I somehow wound up getting one of Malcom’s (the artist who owns the studio) beads in my returned batch.  It is a very nice, deep red, bi-cone shaped bead.  I know I should return it to him some day, but it’s become a measure for me.  It’s very well-shaped, large, and smooth.

When I first started making bi-cone shaped beads, they were very irregular.  They still have issues, and I struggle with getting the shape right.  However, as I keep comparing my beads to his – I’m seeing less and less of a gulf between them.  I know I’ll never be as good as him, but I think I’m developing my own style and I’m quite proud of it!.

Here’s a bunch of pictures of just the latest beads.


I Have a Problem…..

I bought a bunch of glass rods for making beads.  I diligently watched Frantz Art Glass’s sales and bought at the best sale – 50% off many brands/colors and free shipping.  I tried to buy a wide range of colors and treated myself to a couple expensive colors, but didn’t go overboard and kept to mostly value items.

It still was a lot of glass…. I’m certainly set for a while!

Here’s what my collection looks like now… I have enough to make a LOT of beads….


Not that I don’t already have a lot of beads…..

Here’s what it looked like when I organized JUST the beads that I’ve made…. We won’t discuss how many other bins I have of beads….


Search for Pink

Despite the volume of that purchase…. I want a certain color…..

I can’t really name it….

Much less find it!

Sort of a dusty, deep mauve pink.  I want the pink version of this purple color.  Not solid, but more streaky like it.

Pink/reds are the MOST expensive colors in glass.  So I can’t just buy a whole bunch of things and try.

I found three at Frantz that may be what I want – two good possibilities, one not so much but would be a cool color to have.  But, let me explain the pricing.  If I buy ONE rod, of standard colors, it’s about $1 or a little less.  If I buy by the quarter pound, I usually get 5-6 rods for $3-$5.  The one pink color that I think is what I want is $5 per ounce.  They are special – hand pulled – so inconsistent is size.  Most rods of that color are 1.5 – 2.5 ounces.  This is the rod.

Possibly this one, which is closer to $4 for a standard rod:

And this is the third color.  It’s $5 for a quarter pound.  Reasonable, and I think I’ll get to have.

Fusing

I’m going to fire up my kiln and get back to doing some fusing.  I think this is going to fall into the same routine of me buying cool tools and then being afraid to use them.  Finally, I use them and realize how simple it was!

The Pink Color

Today, Perry and I went to JRing Glass.  I was actually trying to find a pink fusing glass color that I could cut into strips and try to make beads of.  I may actually try that with some glass I already have – a hand rolled mauve/pink/white mottled glass.  As long as I use only that glass (its 90 COE) and don’t add dots, or decorations with the 104 COE, I should be fine.  My only fear is that it will act a little differently in the annealing kiln.

But, nothing ventured, nothing gained, right?

I found a couple colors of glass that I wanted to play with.  One was the pink that I’m looking for, and the other is a beautiful purple.   However, they are both “striking” colors.  The sheets are translucent and NOT the color that they wind up after they come out of the kiln. 

That scares me a little. 

Will they strike to the same color if I use them on the torch and then anneal them in the different temperature kiln?

Hmmmmm

Normally, I would buy some of each – the color I wanted for beads and the color that I love…..

But, this glass is EXPENSIVE

A 24 x 24 sheet of clear fusing glass is about $20-25, depending on thickness and clarity/pattern.  A 12 x 12 sheet of single color, simple fusing glass is $7-12, and going up from there for specialty colors. 

This glass is special size.  A 10 x 17 sheet of it is $50.  Some of the striking glasses had small pieces – 8 x 10 – that were priced at $25 or so, but the pink and the purple that I looked at didn’t come in those sizes.  I just couldn’t

So, the decision I made was to get the purple and try a strip or two on the torch to see if it works.  Then, I will use the rest to make myself a special fused piece since purple is MY color.  If it does work, then I may go back and get the pink and try that out too.

In other words – nothing lost!

Tea Light Mold

When I looked at the JRing website prior to going to the store, I noticed that they had some small draping molds on a special sale.  When we got there today, they had a display setup with them and showed a bunch of tea light holders made with them and just a single layer of glass.  Note:  you can “fuse” scrap/stained glass glass if you use ONLY that glass (can’t mix COEs).  That means I could use a lot of really cool glass (that’s also pretty cheap) and make some neat Christmas gifts. 

Perry tried to talk me into buying four of the molds so I could make more at a time in the kiln.  I settled and bought two of them.  I think that they will be my test of the kiln.

Rocks

I’ve been picking up a lot of rocks as I’ve been going to places that have some neat ones.  My plan has been to polish them.  A secondary plan has been to take that flat of red calcite that I bought in Tucson last February, cut it, and polish up the slices.  Back to the “Mary buys tools and then is afraid to use them discussion….”  I bought a wet saw at harbor freight with that sole purpose in mind.

I bought it last winter….

The box has sat unopened in the basement….

After the last round of picking up cool rocks, I went and bought a rock tumbler.

(Did you know that it takes one week per stage to tumble rocks and that there are FOUR stages!?)

So, I bit the bullet today.  Went to the basement and dragged up the box with the wet saw.

I didn’t realize however, that the box said “blade not included”….

A bad word was said…..

I went back to the basement and got the other wet saw.  (When I bought out that woman’s glass fusing setup (how I got the kiln), I also got all her tools, including a well-used wet saw that she used for cutting glass pattern bars. 

At one point, Chris called home:

“What are you doing” Said Chris, in a friendly, enquiring tone.

“I’m sitting on the kitchen floor surrounded by wet saws”

To my husband’s credit, he didn’t ask anything else, nor find that particularly unusual in the great scope of things that Mary does…..
Wet saw #2 (#1? Since it’s older), got dragged outside, I found my safety glass, grabbed a bunch of the calcite, and a spray bottle of water – the large, Home Depot sized bottle.

Lesson #1 learned:  Calcite crumbles when cut.

Oh well…..

Plan B:  what rocks have I collected and put by the small pond in the yard?

Answer:  some really neat ones that showed fantastic patterns when cut.

Lesson #2 learned:  go slowly whist cutting.  Even harder, solid rock will break off.

Lesson #3 learned:  wear the heavy duty work apron that Perry got me next time.

Current status:  The rock tumbler is 2/3 full of rocks (per guidelines) and is on the floor under the sideboard in the dining room where it will be for the next four weeks, rolling away……

Pictures will eventually be posted.

The End (for now)