This is going to be the first of two posts. I’ve had a very stressful day, and while I have a lot I want to write, I also need to de-stress. I’m currently hooked on a game called “Luxor” that I bought from www.bigfishgames.com when they had a groupon out. Yes, I know, I’m a Groupon addict…..
Anyway, I want to write a short (for me) post to address a pattern that a friend of mine wants, and then I need to go do some decompressing with mindless game playing. I intend to get back to this tonight… but it might be tomorrow.
I promise to write about:
· Keeping me honest about my project list
· My Picture Project
· Enrolling in my FREE block of the month
I figure that if put it in writing (like my project list) someone will nag me (or I’ll self nag) and get it done!
Some Definitions:
As I was writing the following article, I decided that some terms may need to be defined (I know that there are some newbie quilters who read my blog)
· WOF = Width of Fabric (a strip cut the width of the fabric)
· Scrappy = many different fabrics in the same piece to create an unorganized look
· Charm Square = a 5 inch square of fabric
· Piano Key Border = a border made of equal width, high contrast strips that resemble the keys on a piano.
· Jelly Roll = a strip bundle of fabric rolled and tied up with a ribbon. Each bundle contains approximately (40) 2-1/2 in. wide x 42 in. strips with some connection; 1 or 2 each from every fabric in a fabric line, all the same color, a color progression, etc.
The Pattern
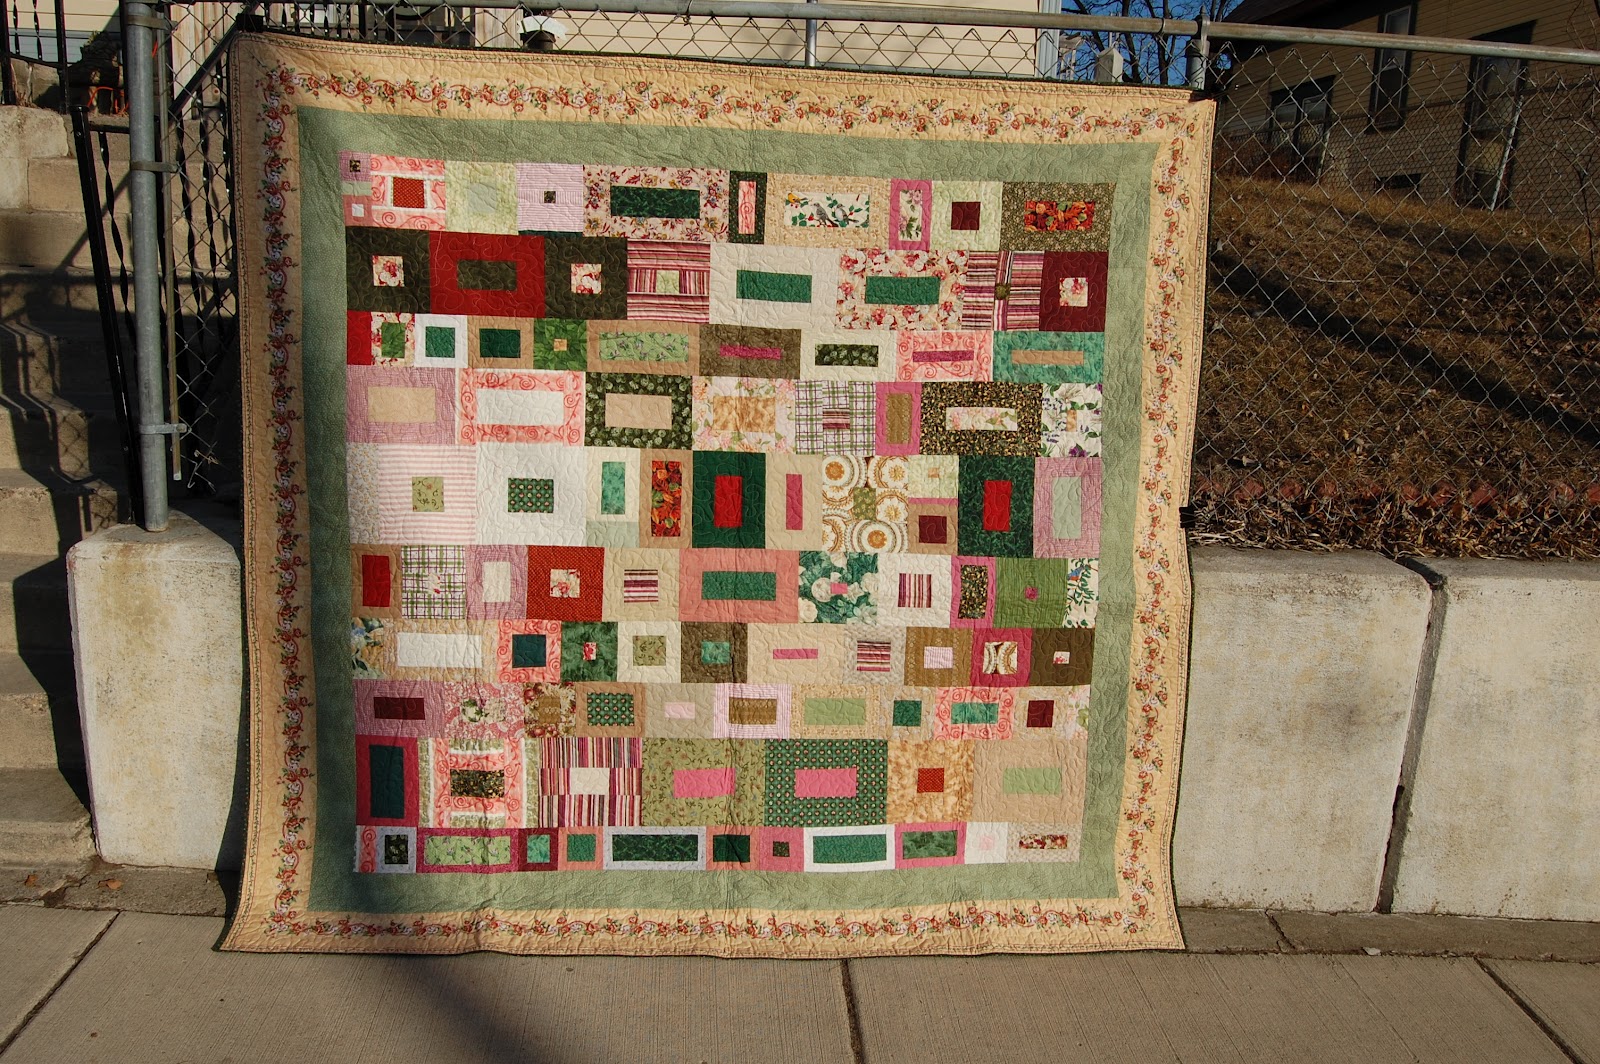
Michelle, a friend of mine sent me a picture of some blocks that she would like to learn how to do. This is not the exact picture that she sent me, but it is the “pattern”.

Some of you may recognize this. This is not really quilt blocks. This is how fabric companies advertise and sell lines of fabric. I’m not positive, but I think it’s actually charm squares laid staggered on top of each other and then cropped in a photograph.
That doesn’t mean that it cannot be a quilt block pattern though!!! I think that Michelle is onto something. This could be a really cool block and a fantastic way to use up scraps!
Prep Work
Those of you who have been at retreats or sewing days with me, or been at my house, know about my bin (now a crate) of scrap rolls. Point one – I don’t like waste, Point two – I fell in love with scrap quilts after my first session of Scrap Tamers at Glad Creations Quilt Shop. I take all my “scrap” pieces of fabric – odd shaped pieces, leftovers, the trimmings from quilt backs, etc – and cut them into strips and squares which I then (neurotically) organize.
· First, anything that is big enough is cut into 6 inch squares. There’s a lot that you can do with that size.
· Next, anything shorter than six inches is cut into the largest square that I can get – down to two inches square.
All the squares are grouped by size and color and stored in a clear bin.
Moving on to pieces longer than six inches but not six inches wide.
· First I cut everything that I can into 2 inch wide strips. That is the size that I use for quilt bindings and piano borders. It’s a convenient size and can be used for many other things too.
· I cut 2½ strips mostly out of WOF pieces and make my own jelly rolls. I don’t cut that size out of scraps a lot unless there isn’t much else I can do.
· 1½ strips are another good size.
· However, I will cut 3 inch strips rather than cutting 2 – 1½ strip because that is a more versatile size to have.
· I will only cut 1 inch strips if there is no other possibility and only if it’s a good quality or interesting fabric.
Boring, or utility fabrics not 2 inches wide go into the “Terry C” basket. Terry is a friend of mine from quilt group who tests patterns for a famous (infamous) paper piece pattern maker. She does far more paper piecing than I do and does really good work. Giving her my plainer, utilitarian small pieces gives her a larger palette of colors to work with. If she reads this, or if someone forwards it to her, maybe I can get her to give me pictures of some of her work and I can do a posting about her!
Once I have all my strips cut, I throw them into the crate. When I get around to it (good long movie on or something), I organize the strips by color and width and roll them onto the color/size roles I already have started. I make a lot of scrappy bindings from the 2 inch wide rolls. I also sometimes make quilts out of ONLY the rolls and squares.
Gallery:
This quilt (except for borders) was made SOLEY out of my scrap rolls
This quilt was made out of scrap squares, scrap rolls and a few small pieces of yardage.

And these runners were all made out of 2½ strips (from my scrap rolls, not from my jelly rolls)


Directions
Enough rambling!
The following directions will give you four approximately 12 inch blocks that are identical.
· 2 repeats of these directions will make 8 blocks = 24 x 48 inch piece
· 3 repeats of these directions will make 12 blocks = 36 x 48 inch piece
· 4 repeats of these directions will make 16 blocks = 48 x 18 inch piece
· 5 repeats of these directions will make 20 blocks = 48 x 60 inch piece
· 6 repeats of these directions will make 24 blocks = 48 x 72 inch piece
· 9 repeats of these directions will make 36 blocks = 72 x 72 inch piece
· 12 repeats of these directions will make 16 blocks = 72 x 96 inch piece
And so forth
1. Gather up 2 inch wide strips of fabric. If you follow this pattern as I write it, for each block, you will need:
v Center: 1 – 6½ square of fabric
v Row 1: 32 inches (can be cut from 1 strip of WOF)
v Row 2: 44 inches (can be cut from 1 strip of WOF (could be a close call))
v Row 3: 56 inches (can be cut from 2 strips of WOF)
v Row 4: 68 inches (can be cut from 2 strips of WOF)
v Row 5: 80 inches (can be cut from 2 strips of WOF)
v Row 6: 92 inches (can be cut from 3 strips of WOF)
v Row 7: 104 inches (can be cut from 3 strips of WOF)
2. Cut the strips above as follows
v Row 1: 2 – 6½ inches, 2 – 9½ inches
v Row 2: 2 – 9½ inches, 2 – 12½ inches
v Row 3: 2 – 12½ inches, 2 – 15½ inches
v Row 4: 2 – 15½ inches, 2 – 18½ inches
v Row 5: 2 – 18½ inches, 2 – 21½ inches
v Row 6: 2 – 21½ inches, 2 – 24½ inches
v Row 7: 2 – 24½ inches, 2 – 27½ inches
3. Sew a 6½ strip on either side of the square

4. Press the seams outwards
5. Sew the matching 9½ strips to the other sides

6. Press the seams outwards
7. Sew the 9½ strips from the next row to the sides as with the 6½ strips

8. Repeat in the pattern until all strips are used
9. Cut the block in half along both center lines

You will now have four identical blocks.

Repeat this entire pattern and make more blocks. Mix them up and sew together as illustrated in this picture.
Add borders as desired.
No comments:
Post a Comment